Now is the time where Year 12 students are getting their Trial HSC exams results. Some will be delighted. Some will be disappointed. Regardless of the result and how students feel about them, they are still only 50% of the way there. They are only half way through the HSC marathon and there is still lots of room to grow. It is now the time to review study plans and focus areas. A strategic way to do this is to support students to do a deep dive of their their results.
I’ve used this template with my Year 12 Chemistry students. After students finish the template, we have a one-on-one chat. We discuss what they need to focus on from now until the written HSC exams. Students also use the same template when they do past HSC so they can continually adjust their study plans.
You can download and customise the exam reflection template.
An AI ‘takeover’ in schools is often portrayed as being inevitable and the teaching profession has little control over it. That teacher skepticism to AI tools is a barrier to “progress”. This false narrative displaces teachers as the experts of teaching and learning. Is student uptake of AI more unprecedented than expected? Yes. Can more be done in the space of professional support for teachers? Yes, a lot more. This is why Michael Sciffer and I led a session at the Quality Teaching in Practice Conference (QTiP25) at Newcastle University. We aimed to show teachers how they can empower their students to become ethical and critical learners in the age of AI; to challenge situations when AI diminishes rich learning opportunities. When we designed our session, we found the space was dominated by for-profit technology companies promoting their AI products (often under the guise of professional learning and teaching resources). What was missing was supporting teachers to teach students how to have conversations on the ethical and critical use of AI, and challenge each other’s assumptions, from academic situations to everyday life scenarios. That’s what our QTiP25 session focused on and this blog post summarises our session and resources. Our session was strongly influenced, and builds on, the fantastic professional learning on generative AI from NSW Department of Education.
Thinking scaffold to decide IF and HOW AI should be used
We adapted the GENAI assessment scale into a thinking scaffold that school-aged students and teachers can use to discuss how AI and enhance and diminish their learning. The scaffold has six levels of AI integration and asks students/teachers to think about the positives (pluses), negatives (minuses) and interesting considerations for each level of AI integration. Students/ teachers then use scaffold to decide and justify on a level of AI integration that would best enhance their learning. the The scaffold can be used to co-create agreed expectations of the uses of AI in a range of learning tasks, projects and units of work. The scaffold is designed to be used in small group situations, but can used individually.
Classroom conversations to co-create expectations of AI use
After each small group completes the AI thinking scaffold, the group nominates one representative to join a Socratic seminar. To support students (and teachers) to have robust conversations to co-create agreed expectations of AI use from diverse opinions, we selected specific Socratic sentence starters. The sentence starters are selected to encourage students (and teachers) to present different views, challenge each other’s assumptions, to ask each other to justify their reasoning and to support each other.
We also designed additional scenarios for students and teachers to think about where the use of AI extends beyond a learning activity and the classroom. They are designed to be used with the Socractic sentence starters to challenge the impacts of AI use in the context of integrity, equity, honesty and essentially, what it means to be human.
Our session at the QTiP25 conference emphasised the importance of equipping teachers and students with the skills to engage critically and ethically with AI. By enabling robust discussions to co-create expectations around AI use, teachers, as the experts of teaching and learning, can lead their students to collectively decide how AI is used (or not used at all) to enhance and protect rich learning opportunities.
In a perfect world, every lesson will be well planned and timed. However, every teacher has found themselves stuck with nothing planned. Maybe it’s because a colleague is too sick to send in work. Here are three fast, no-prep activities to keep in your teaching toolbox so you can take them out for any of these moments. They can be set as a whole class task, small group activities or individual tasks. They are also great for students who are fast finishers.
Non-fiction text reflection
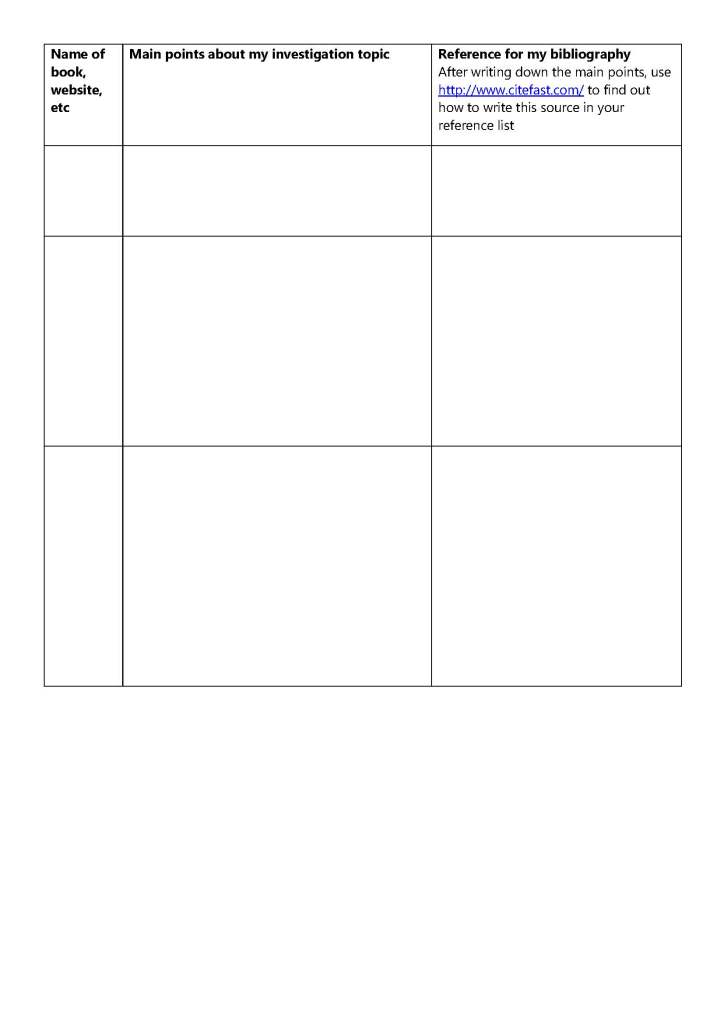
Book your class into the school library or ask the Teacher Librarian to curate a selection of non-fiction texts (which may be related to the current topic, or not). Allocate 10 minutes for students to sample a book and fill in the non-fiction text reflection sheet. Repeat this two to three times depending on the length of your lesson. Then have students speak to each other about the books and select some students present to the class. You can even have students choose to borrow some of the books. I have done this activity many times and students love it. It’s a great way to explore the school library’s collection and to slow down and take a breather.
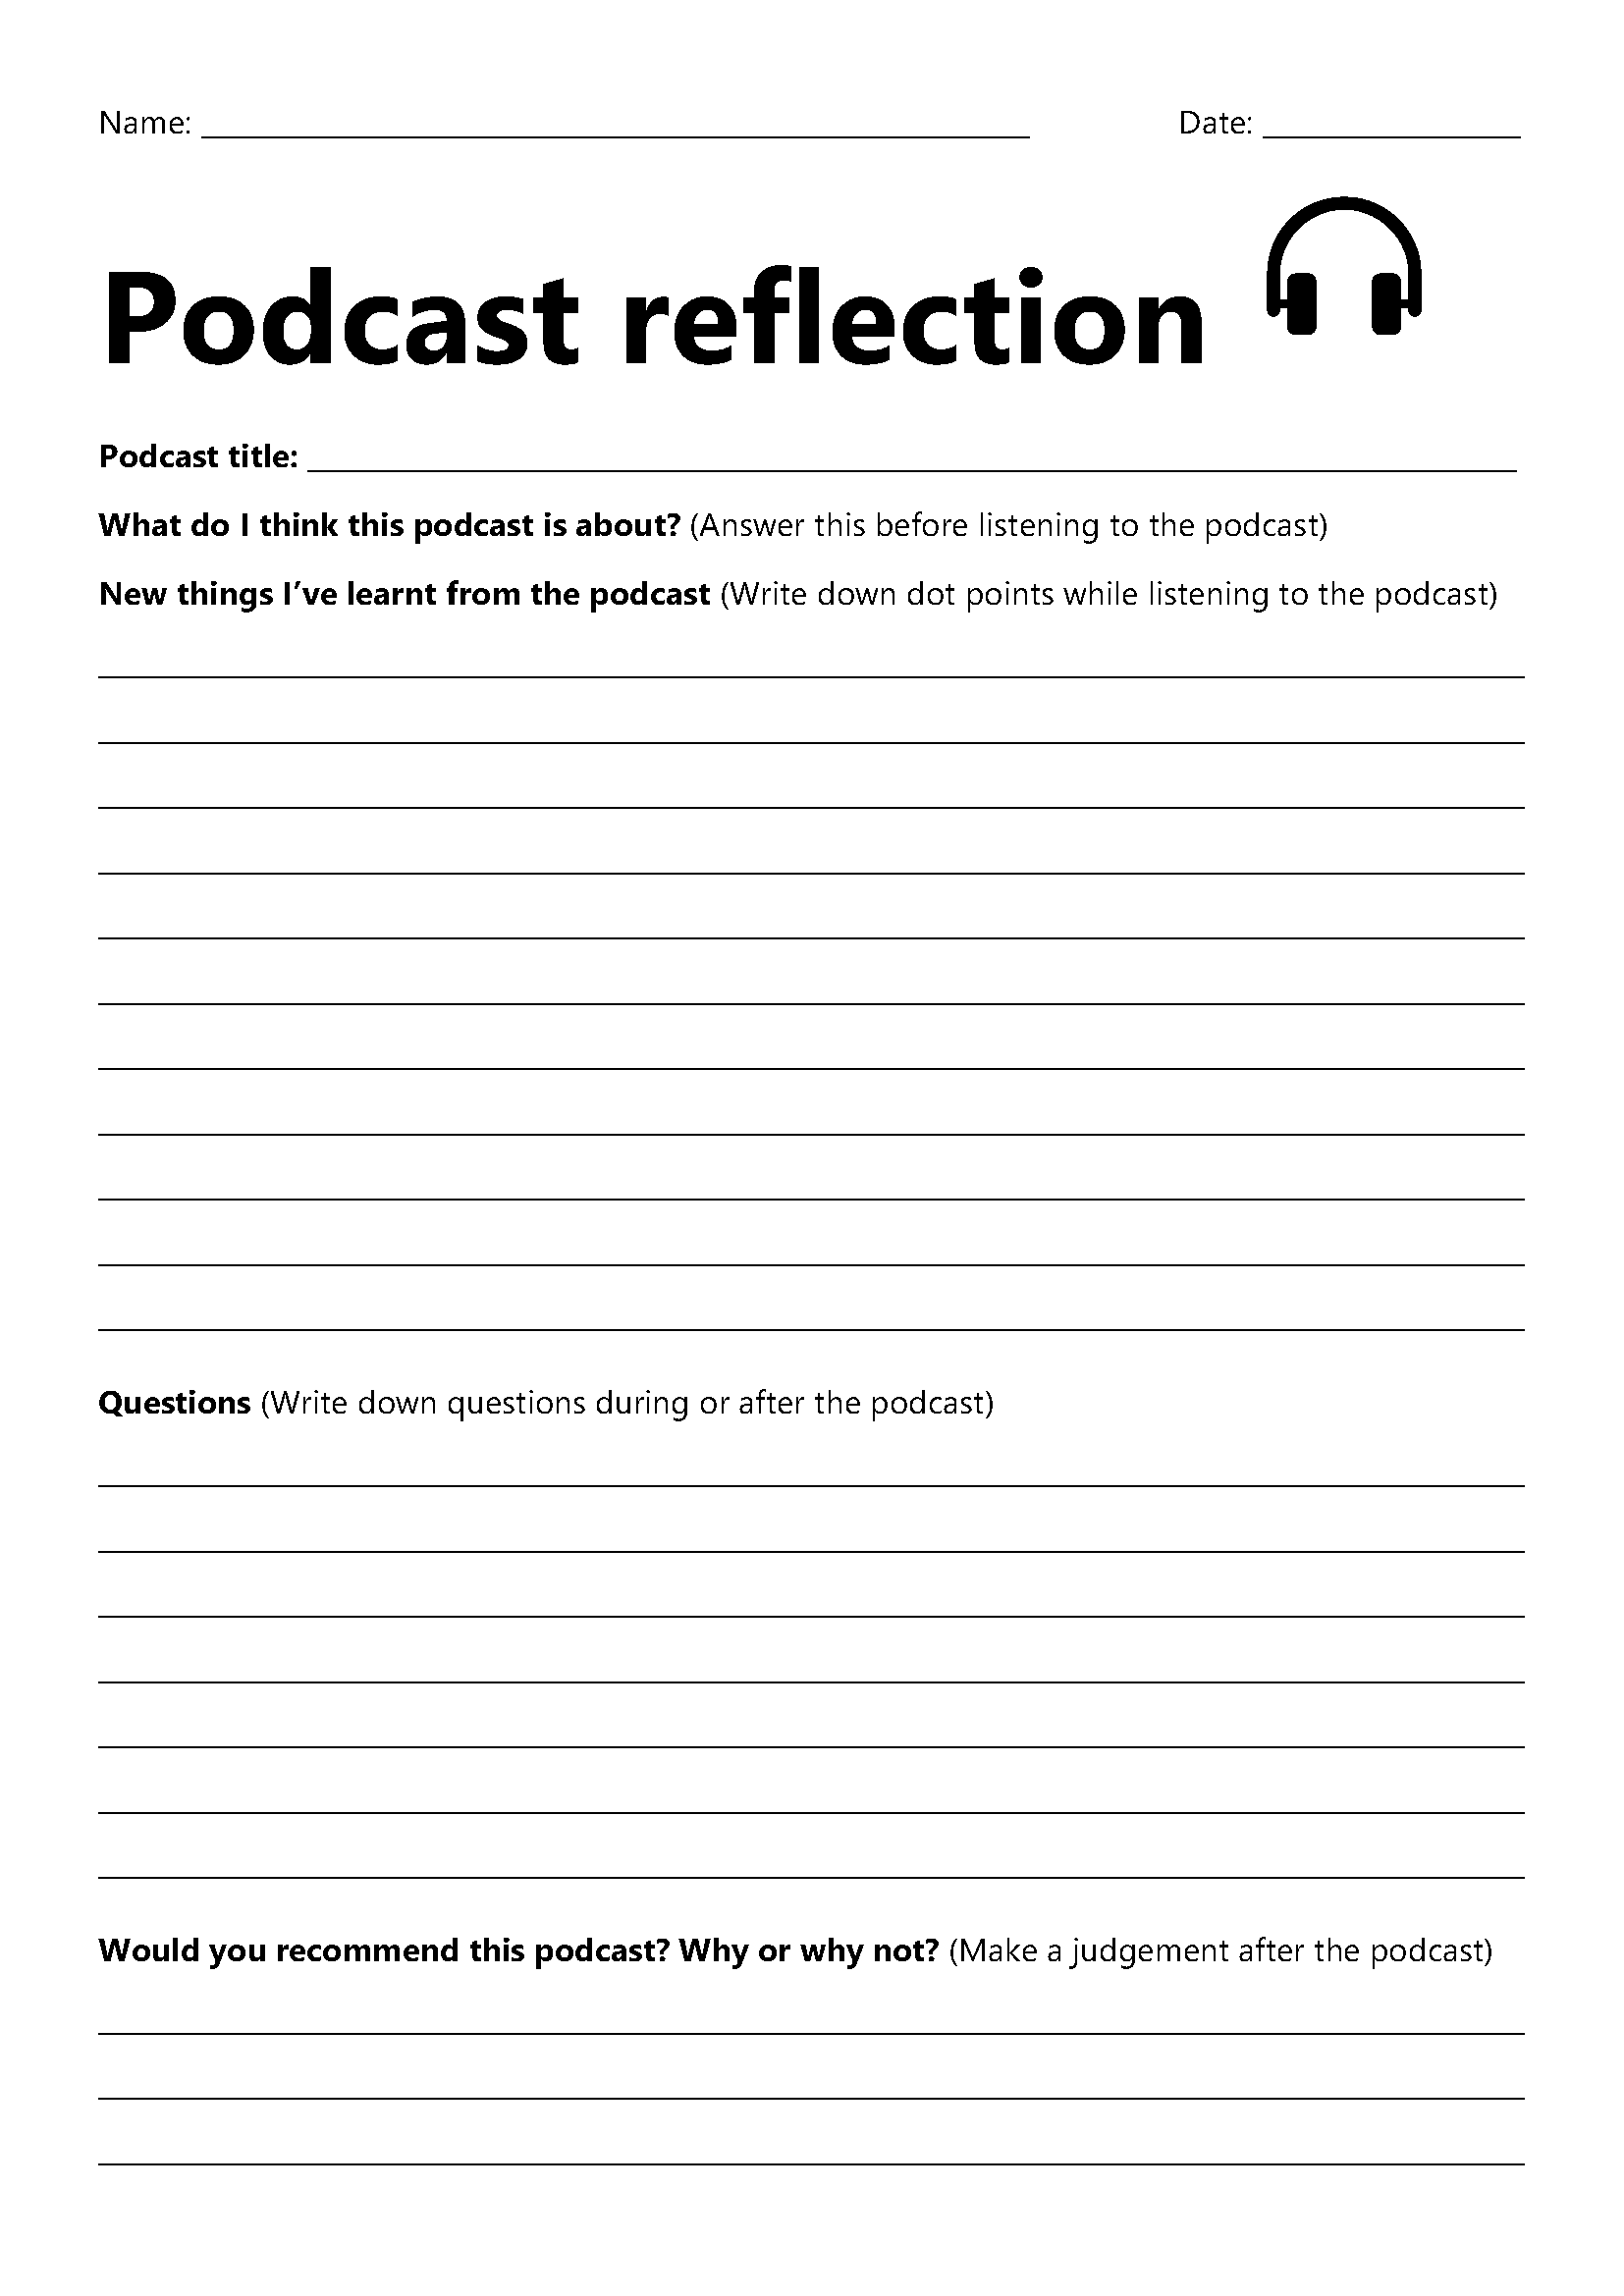
There are so many interesting videos and podcasts out there. Some of my favourite YouTube channels are Amoba Sisters, ASAP Science and Minute Physics. I love ABC listen for children-friendly podcasts. You can have the whole class view the same video or listen to the same podcast, or let students choose their own. I like to use reflection sheets for students to jot down their learnings and have them share it with their peers.
This is a simple yet powerful learning activity. Set a timer for 5 minutes, 10 minutes or 15 minutes. In the allocated time, students write a recount of informative text on what they have learnt this week, this term, the year so far or whatever you want them to (or whatever they want to). The key is to be like lightning and keep writing until the time runs out. So many other learning opportunities can follow. You can have students do a think-pair-share, select students to read their writing to the class or have students use their lightning writing sample to create a multimedia presentation to teach their peers.
What are your go-to activities?
What are your fast, no-prep activities for when you have nothing planned? Share yours by commenting below.
Are you a pre-service teacher about to do your practicum? Or are you a graduate teacher about to enter the profession? Wondering how to effectively use technology as a teacher and with your students, in a way that enhances your wellbeing?
I recently presented at a pre-service teachers conference at University of Technology, Sydney on using technology effectively in the classroom. Here are the highlights of the session. These tips are targeted at pre-service teachers about to go on their practicums and graduate teachers about to enter the classroom.
Google or Microsoft? (or Canvas or everything?)
Many schools will use mainly Google or Microsoft. For Google, this may mean all classes use Google Classroom and the apps that come with Google Workspace for Education such as Google Docs and Google Slides. For Microsoft, this may mean all classes use Microsoft Teams and OneNote Class Notebook. Other schools will use Canvas. Some schools will use a mixture of everything. Before you start teaching at your new school, ask which platforms the students you will be teaching will mostly use so you can become familiar with them. Ask to be added to other teachers’ Google Classrooms and Microsoft Teams (same year level if possible and same subject) so you can see what they’re doing with their classes. My school uses Google Classroom with students and I always add beginning teachers to my Google Classrooms when they ask. That way, they can reuse my posts on their Google Classrooms as a way to support them to develop their craft. For more details on how I use Google Classroom, see this post.
Get WiFi access BEFORE your practicum
This tip is mainly for pre-service teachers doing practicums in a NSW public school. When you first contact your supervising teacher or in your pre-practicum, ask them how to get a NSW Department of Education account for pre-service teachers so you can log into the WiFi. You are not suppose to ask others to log on for you and you don’t want to be using your mobile phone hotspot for your whole practicum. GET THIS ORGANISED BEFORE YOU START YOUR PRAC!
Digital wellbeing
Many teachers (including me) have work apps like Outlook, Google Classroom, Microsoft Teams and Sentral on our personal phones and tablets where everything is synced across. This can be very convenient (For example, I usually have my laptop connected to the interactive panel to display the lesson starter activity and I mark the roll on my phone.).However, this also means your work can slowly creep into your personal life and you find yourself responding to every ‘ping’ from your work apps on your personal devices. Everyone has a different way of working and you have to find out what works for you while respecting your colleagues’ personal time and the school systems policies. Here are some considerations:
Learn how to schedule send emails (and Teams chat messages) so if you want to write a message in the evening after work hours because it is fresh in your mind, you can have the message land in your colleagues’ emails or Teams chat during work hours. This means you can work the way you want and respect others’ personal time. If you are a pre-service teacher, ask your supervising teacher how they work outside of school hours so everyone has a shared understanding of contact outside school hours.
Set expectations for your students. This is particularly relevant for high school. Teenagers often do school work in the evenings, at night (sometimes in the early hours of the morning) and on weekends. I tell my students they can post on Google Classroom at any time, but I will look at their posts and respond on Monday to Friday between 8am and 5pm. I have separate expectations in the school holiday period, depending on the circumstances. If you are a pre-service teacher, ask your supervising teacher what their expectations are for the classes you are taking.
If you choose to have work apps on your personal phone, know the privacy implications for the relevant school system. Move these work apps to the last screen of your phone so they’re not immediately visible and available for you to tap when you unlock your phone. Explore features like Focus mode, Personal mode and Do Not Disturb mode to see if and how they work for you.
Tips from teachers for teachers
And finally here are the tips from teachers, deputy principals and principals (who I highly respect and are known for their educational technology expertise and innovations) specifically for pre-service teachers and beginning teachers. 🙂 A big thank you to every one of them for sharing their advice.
Every student I’ve worked with wants to do well at school. But what does this look like for each student and how do they get there? This is where goal setting can be very powerful.
Goal setting is a well-known strategy to improve student motivation, resilience and academic achievement. Doing a Google Search will bring up many articles supporting this. Some of my favourite ones are from Edutopia and What Works Best from the NSW Department of Education.
But what does goal setting look like in a classroom and how can it be implemented sustainably and consistently? In this post, I will share what has worked (and what hasn’t worked) for me in leading the implementation of goal setting for over 200 students and involving 20 teachers. I have packaged the latest collection of promising practices into a OneNote notebook, which teachers and download and customise.
So, these are the strategies, practices and resources that have worked for me (all are in the OneNote notebook).
Supporting students to help students set SMART goals
S = specific M = measurable A = achievable R = realistic T = time-bound
SMART provided a framework for students to set personalised goals that are personal, aspirational and realistic. SMART also reduces the number of well-intentioned goals where progress and success are difficult to measure, such as “try harder in maths”, “get better grades” and “concentrate more in class”. Some videos I’ve found useful in explaining SMART goals to students are Setting Goals from BrainPOP and How to write a SMART goal from Khan Academy and
But it isn’t enough to know what SMART goals are. I found students needed a comprehensive scaffold, particularly in:
Breaking down goals into smaller mini goals
I included this in the ‘specific’ section of SMART. When students have identified a goal, they are guided to identify three smaller steps to achieve the goal. This was important for students to track and assess their progress. The smaller goals not only help students to work towards their goals but also allow them to see success and stay motivated when they have achieved a smaller goal.
Identifying barriers and ways to overcome them
This part was optional for my students but for those who did it, it allowed them to see if their original goal was realistic for them and/or identify ways to remove known obstacles that may stop them from achieving their goal.
Sharing progress and accomplishments with family
My prior attempts with goal setting have largely involved it being a very personal experience for the student. Students completed a goal setting resource and at the end of the semester, they reflected on whether they had achieved their goal.
There was nothing wrong with the above approach, but to make the goal setting process more meaningful, I now have students write a personal reflection comment that goes onto their end-of-semester academic report. Students know the intended audience of the comment is themselves and their parents/carers. The personal reflection comment acts as a culminating product that nicely wraps up a yearly goal setting process.
And now to tie all the promising practices into one delivery mechanism – OneNote Class Notebook.
Why OneNote is the best tech tool for goal setting
I have used hardcopy booklets, Google Doc, Google Slides and Google Forms to deliver goal setting programs. It is OneNote Class Notebook that has been the most effective in delivering a responsive goal setting program, particularly for a large group of students that is being delivered by a large number of teachers. How does OneNote Class Notebook do this?
Supporting consistent implementation by offering a baseline resource package that can be used as is but has the flexibility to be customisable. This means teachers who are very new to goal setting have a resource they can take straight to their class and the teachers who are more experienced with goal setting can modify the resource to suit their needs and their students’ needs.
Providing ease of monitoring – OneNote Class Notebook allows the teachers who are leading the program to see the progress of every student in every class. This means we didn’t have to wait for scheduled meetings and self-reporting processes to identify which students/classes/teachers may need additional support. We can see how everyone is going anytime and be proactive in providing support.
Allowing ongoing, responsive adjustments – This is where OneNote Class Notebook has outshined the other tools. With hardcopy resources and Google Workspace apps, once the resource has been printed/distributed, it is overly complex to adjust it. With OneNote Class Notebook, resources can be distributed one page at a time so future resources can be prepared, adjusted based on feedback if needed and distributed when a student or class is ready. OneNote Class Notebook is like a digital binder so every page that is distributed still feels like and appears to be a cohesive package. It’s not a bunch of separate Google Doc files, a bunch of different Google Classroom assignment posts or a bundle of hardcopy papers.
The teachers leading the goal setting program created instructional videos on the technical aspects of OneNote Class Notebook such as how students get to their OneNote notebook and the structure of their OneNote notebook. This meant teachers who are not confident with OneNote could use the instructional video to guide their students. We also provided in-class team teaching for teachers who requested it.
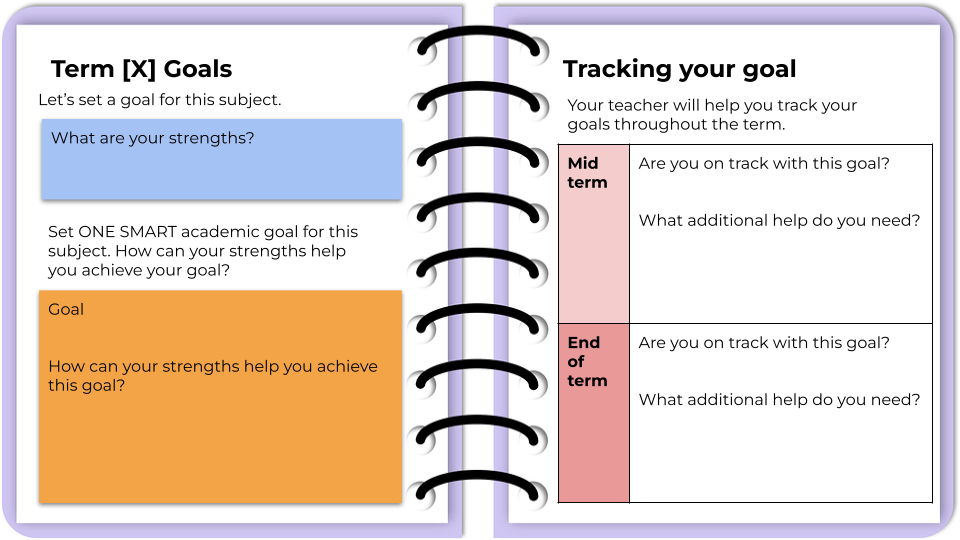
The goal setting OneNote package
Download the Goal Setting OneNote notebook for your students. See here for more information on how to use OneNote Class Notebook to further customise the notebook and distribute it to your students. If you do use the resource, I would love to hear your feedback.
Despite being well into the 21st century, schooling is still stuck in the 1900s, demanding consistency and conformity. Learning is driven by bells and timetables. School systems want learners to do the same thing, at the same time, in the same way.
If we’re to shift these issues in a child’s school career by 2040, we must transform the schooling system to adapt to the needs of learners and teachers.
Do Australian children have to spend so many hours at school?
Do teachers have to spend so many hours face-to-face teaching?
Does school have to be five days a week?
Can students have an opt-in day, so they only have to attend school for four days a week?
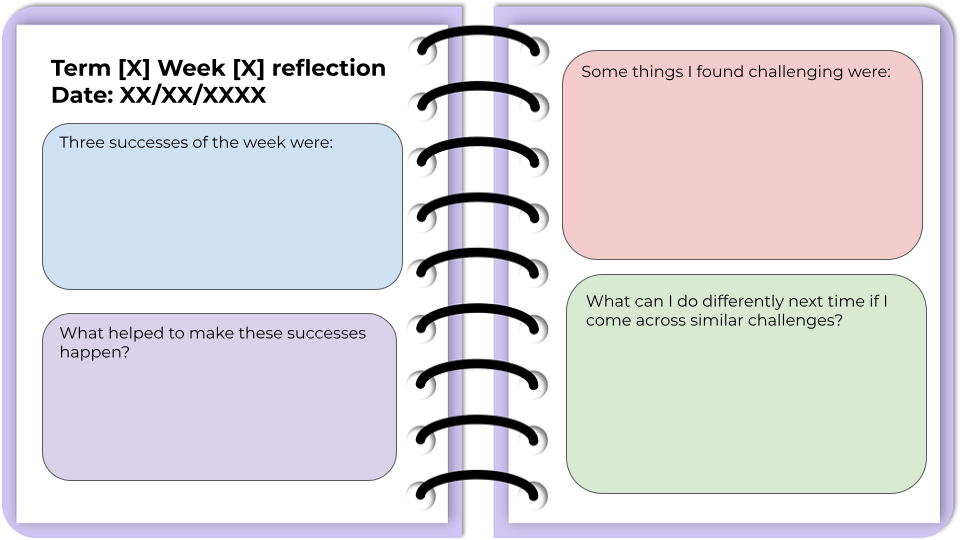
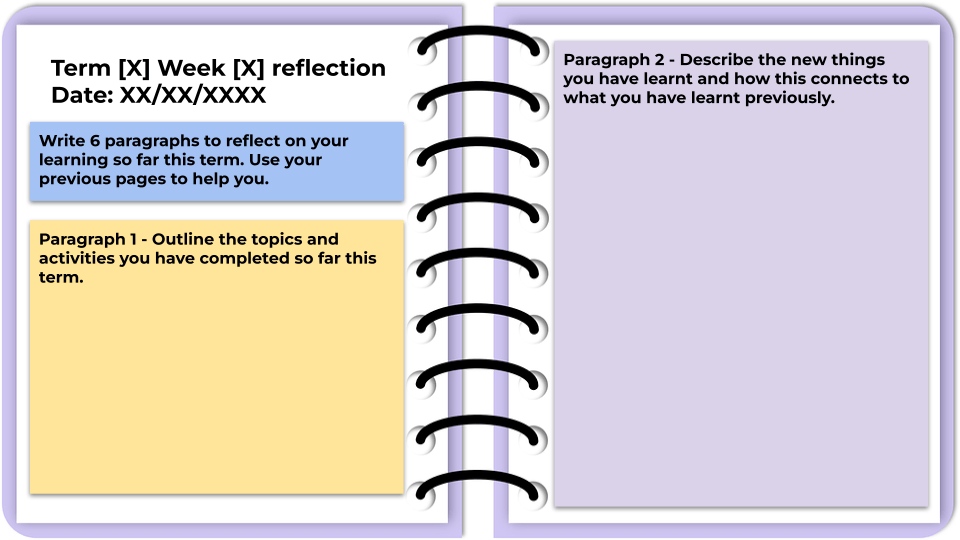
Last year I trialled digital learning logs with my Year 7 maths and science class, which you can read about here. Overall, I found it beneficial as my students were given regularly dedicated time to reflect on their learning, with a focus on what work they are proud of, the challenges they faced, how they overcame these challenges and what they can do differently next time. While students appreciated the time to stop and think about their learning, time was also a barrier to this initiative. Sometimes it felt like there was no time to do this and if we used lesson time to reflect, then we will fall behind. This challenge became very obvious in the last term of the year when students had a large number of assessments and end-of-year activities that we missed some of our dedicated time for learning logs.
So I’ve created the third iteration of the learning log, which only has six weekly reflection activities and a goal setting/tracking page that is equivalent to two weekly reflection activities. So there is a total of eight weekly activities, which provides a buffer for other things that come up during the term like assessments, excursions, incursions and other disruptions. I’ve changed some of the reflection activities to embed more extended writing which may be more suitable for older students. I’ve also incorporated an ACE score in some of the activities, which is a student self-assessment on their attitude, commitment and effort. This was inspired by Trangie Central School.
You can download your own copy of the learning log template to adapt and use with your students.
In high school, the curriculum often feels overcrowded and rushed. There are just too many things to cover and not enough time. However, it is important to give students the time to stop and think about what they are learning and how they are learning, which are important for becoming self-regulated learners. Students need to be supported to set goals, monitor their progress towards their goals, identify areas for improvement and evaluate the usefulness of different learning strategies.
Using learning logs to guide student reflection
Last term, I decided to prototype learning logs with my Year 7 mathematics and science class. We dedicated 50 minutes every week where we stopped “pushing through the curriculum” and wrote learning reflections. We used the learning log Google Slides template from the NSW Department of Education.
We wrote in our learning log every Friday, for ten weeks. In our dedicated learning log lessons, we would first brainstorm as a class what we have learnt in mathematics and science this week. We did this on Zoom using annotation tools as we were in remote learning due to the COVID-19 pandemic. I shared the following template on Zoom and students used the text annotation tools to do a class brainstorm. The template was modified from an existing Canva template.
After we have completed our weekly reflection brainstorm, I would ask volunteer students to unmute in Zoom and elaborate further on their thoughts. Students will then individually write in their learning logs.
Here are some samples of our reflections.
Benefits of learning logs to guide student reflection
I liked this learning log template because it provided students with a variety of reflection questions. This is opposed to asking students to write a reflection or journal entry as an extended writing activity, which many students find challenging because not only are they trying to think about their own learning, but they also have to learn the structure and language of reflective writing.
As a teacher, I also found these learning logs useful as a form of formative assessment. I can use the students’ self-assessment on what they are confused about or from their questions on the topic to guide my lesson planning for the next week.
Challenges of learning logs and student reflection
Some of the challenges we faced were some students wrote very little in their learning logs at first and I had to work quite intensively with them to write more for each reflection question. Some students also did not yet see the value of reflection and completed the entries with minimal thought and as quickly as possible. However, their attitude and work standard improved over the term.
A huge challenge was TIME. As I mentioned earlier, the curriculum is overcrowded and learning often feel rushed. At the start, I found myself questioning whether I can spare 50 minutes each week for learning logs. However, after persisting for a term, I think the time is worth it. Having dedicated time to support students to self-assess, to think about their own learning and reflect on their successes will help them grow into self-regulated learners.
Where to next
Next term, I am going to continue the learning log with my Year 7 class, but I’m going to change some of the reflection questions. I would like to move them towards reflecting more on learning strategies and the significance of what they are learning. There are some sample reflection questions from an Edutopia post that I would like to incorporate. Eventually I would like to make better links between the learning log and their goal setting processes.
If you are thinking about embedding student reflection in your lessons, I would highly recommend scheduling a dedicated time for it each week/fortnight. Giving it class time show students the activity is valued. It is not something they do at home or done as an extension activity. While it does take time away from continuing with content, it is worth slowing down and allowing students to think about their learning. The learning log template I mentioned earlier is a great way to start.
I have a STEM class this year again. Yippee! The last time I had a STEM class was in 2019 and their first project was the cardboard games challenge, which I have previously blogged about. This year, my class is different (every class is different) and according to their pre-tests, needed more support in working effectively in teams and more guidance in designing fair investigations and communicating their findings. So we decided to dive into some mini challenges to launch into STEM, before settling into longer-term projects. The series of mini challenges are low prep, low cost, quick to do and are designed for students to consolidate the skills they need for more complex projects. The processes, scaffolds and success criteria are repeated with each mini challenge and are designed so there is a gradual release of responsibility.
This blog post contains an outline of each mini challenge and the resources I used. I used them with my Year 8 class, but they can be adapted to younger or older students. This post also contains a brief reflection on what worked well and what can be done differently.
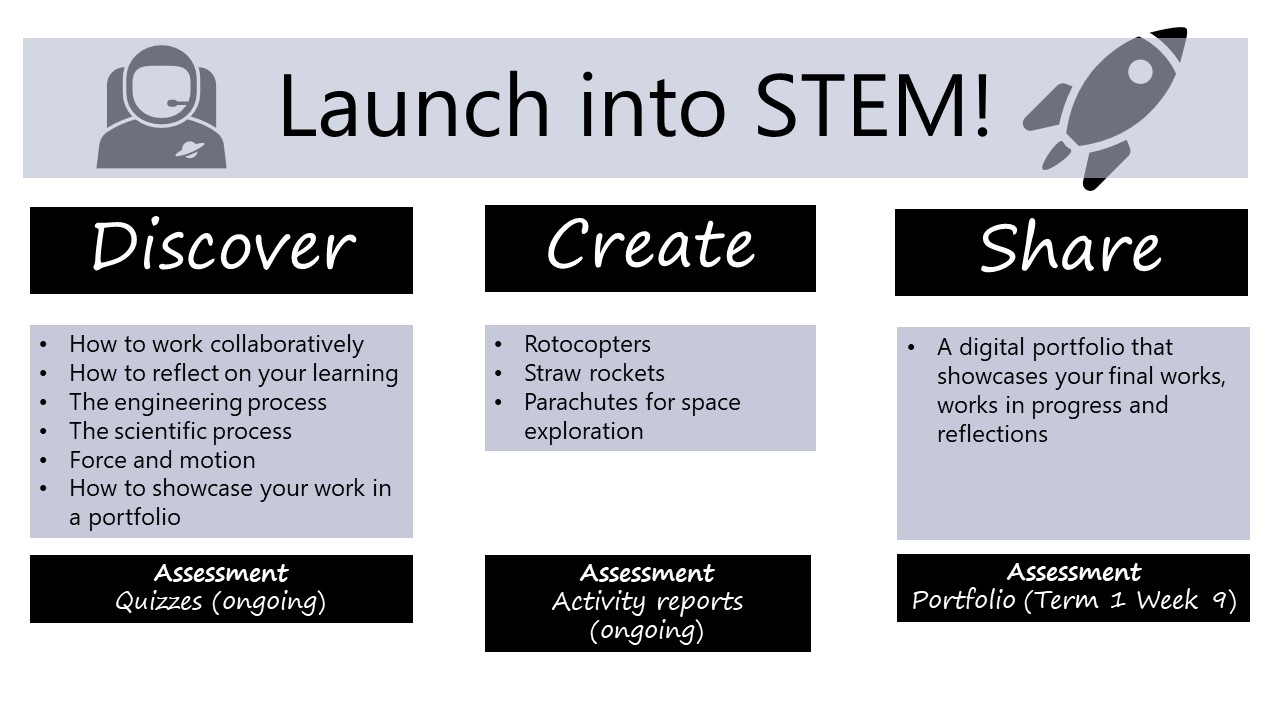
Launch into STEM
Our project outline is shown in the graphic below.
Mini challenge one – rotocopters
The first mini challenge was rotocopters. This is a very easy challenge so students can focus on developing their skills to identify independent, dependent and controlled variables, selecting and using appropriate equipment to make measurements, using basic statistics to analyse results and writing an investigation report. When students have done this challenge once, they can start changing the design of the rotocopters to have it fall slower, spin faster, etc. To support students to brainstorm on ideas and negotiate on an agreed idea, we used a PMI chart.
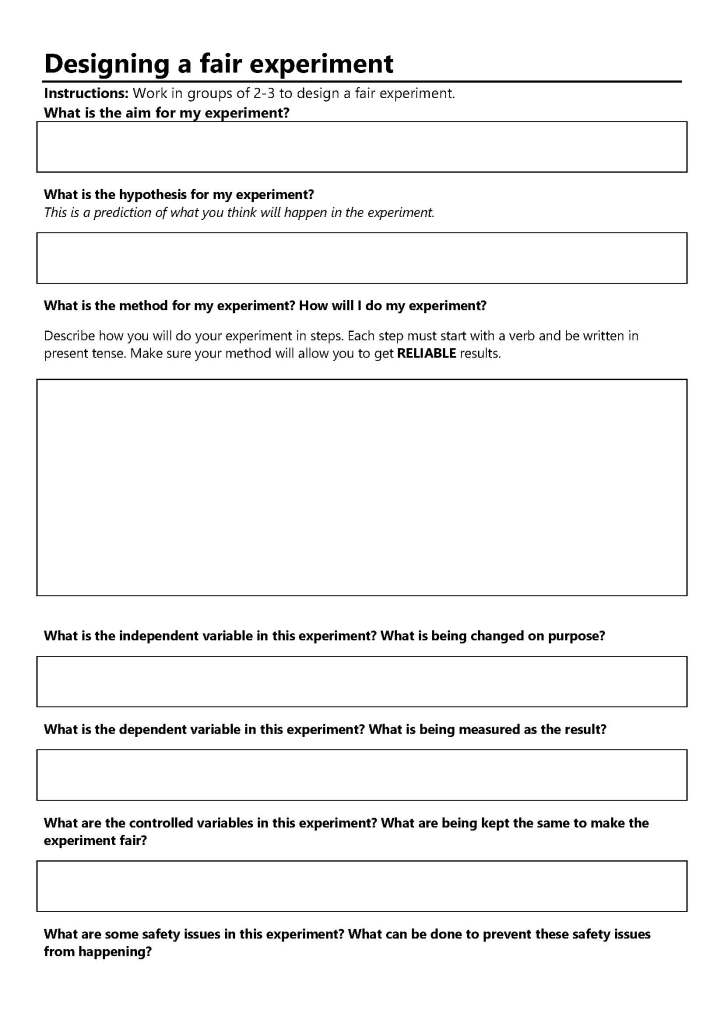
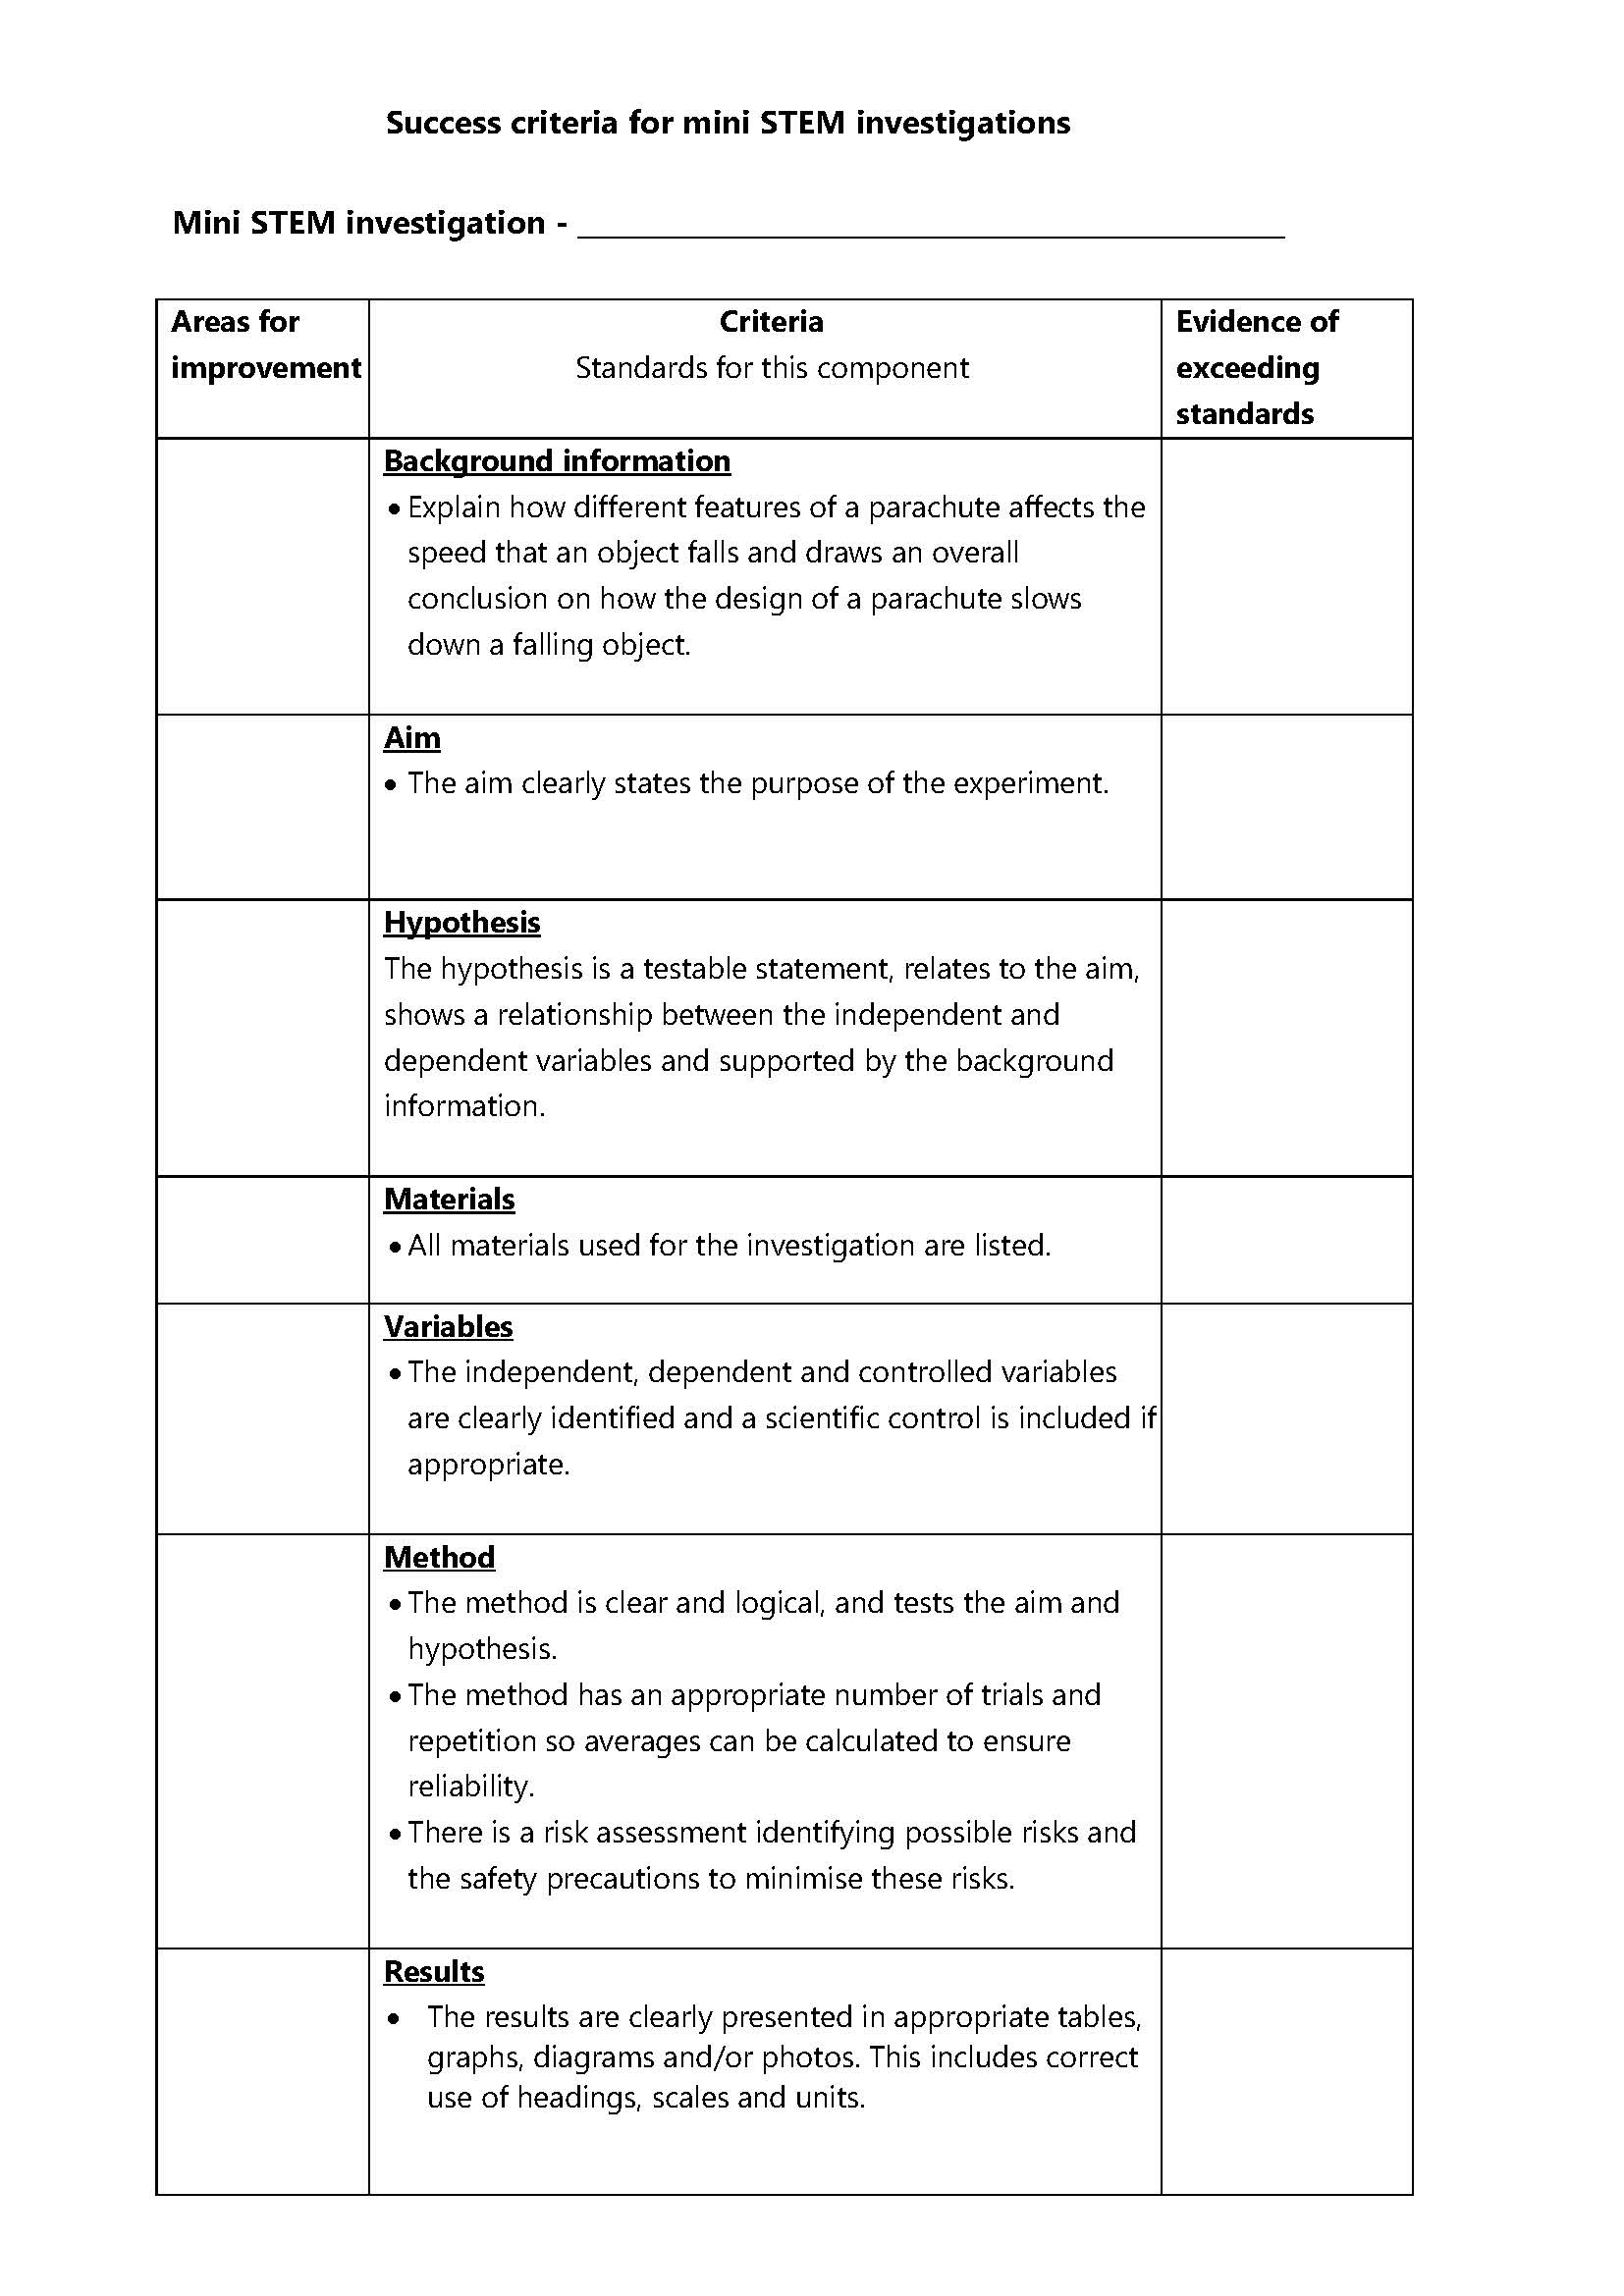
I used the following scaffold and success criteria to help students design a fair investigation and to write an investigation report.
Our second mini challenge was straw rockets from NASA’s Jet Propulsion Laboratory. The NASA website has everything you and your students need, from written and video instructions on making the rockets to explanations on how rocket propulsion works. While this challenge seems easy, the extension opportunities are endless. We used the same scaffolds from the rotocopter challenge so students can get another go at improving their work. They can implement the feedback they got for the rotocopter challenge. For the air rockets, I introduced the following reflection questions for students to complete at the end of the challenge.
How much did you know about air rockets before this experiment?
What problems did you have with this experiment? This may include working in a team.What did you learn about yourself in this experiment? This may include working in a team.
Did you do your work the way other people did theirs? Explain.
What is one thing you would like to improve on if you did the experiment again?
If you were the teacher, what comments would you give to your work?
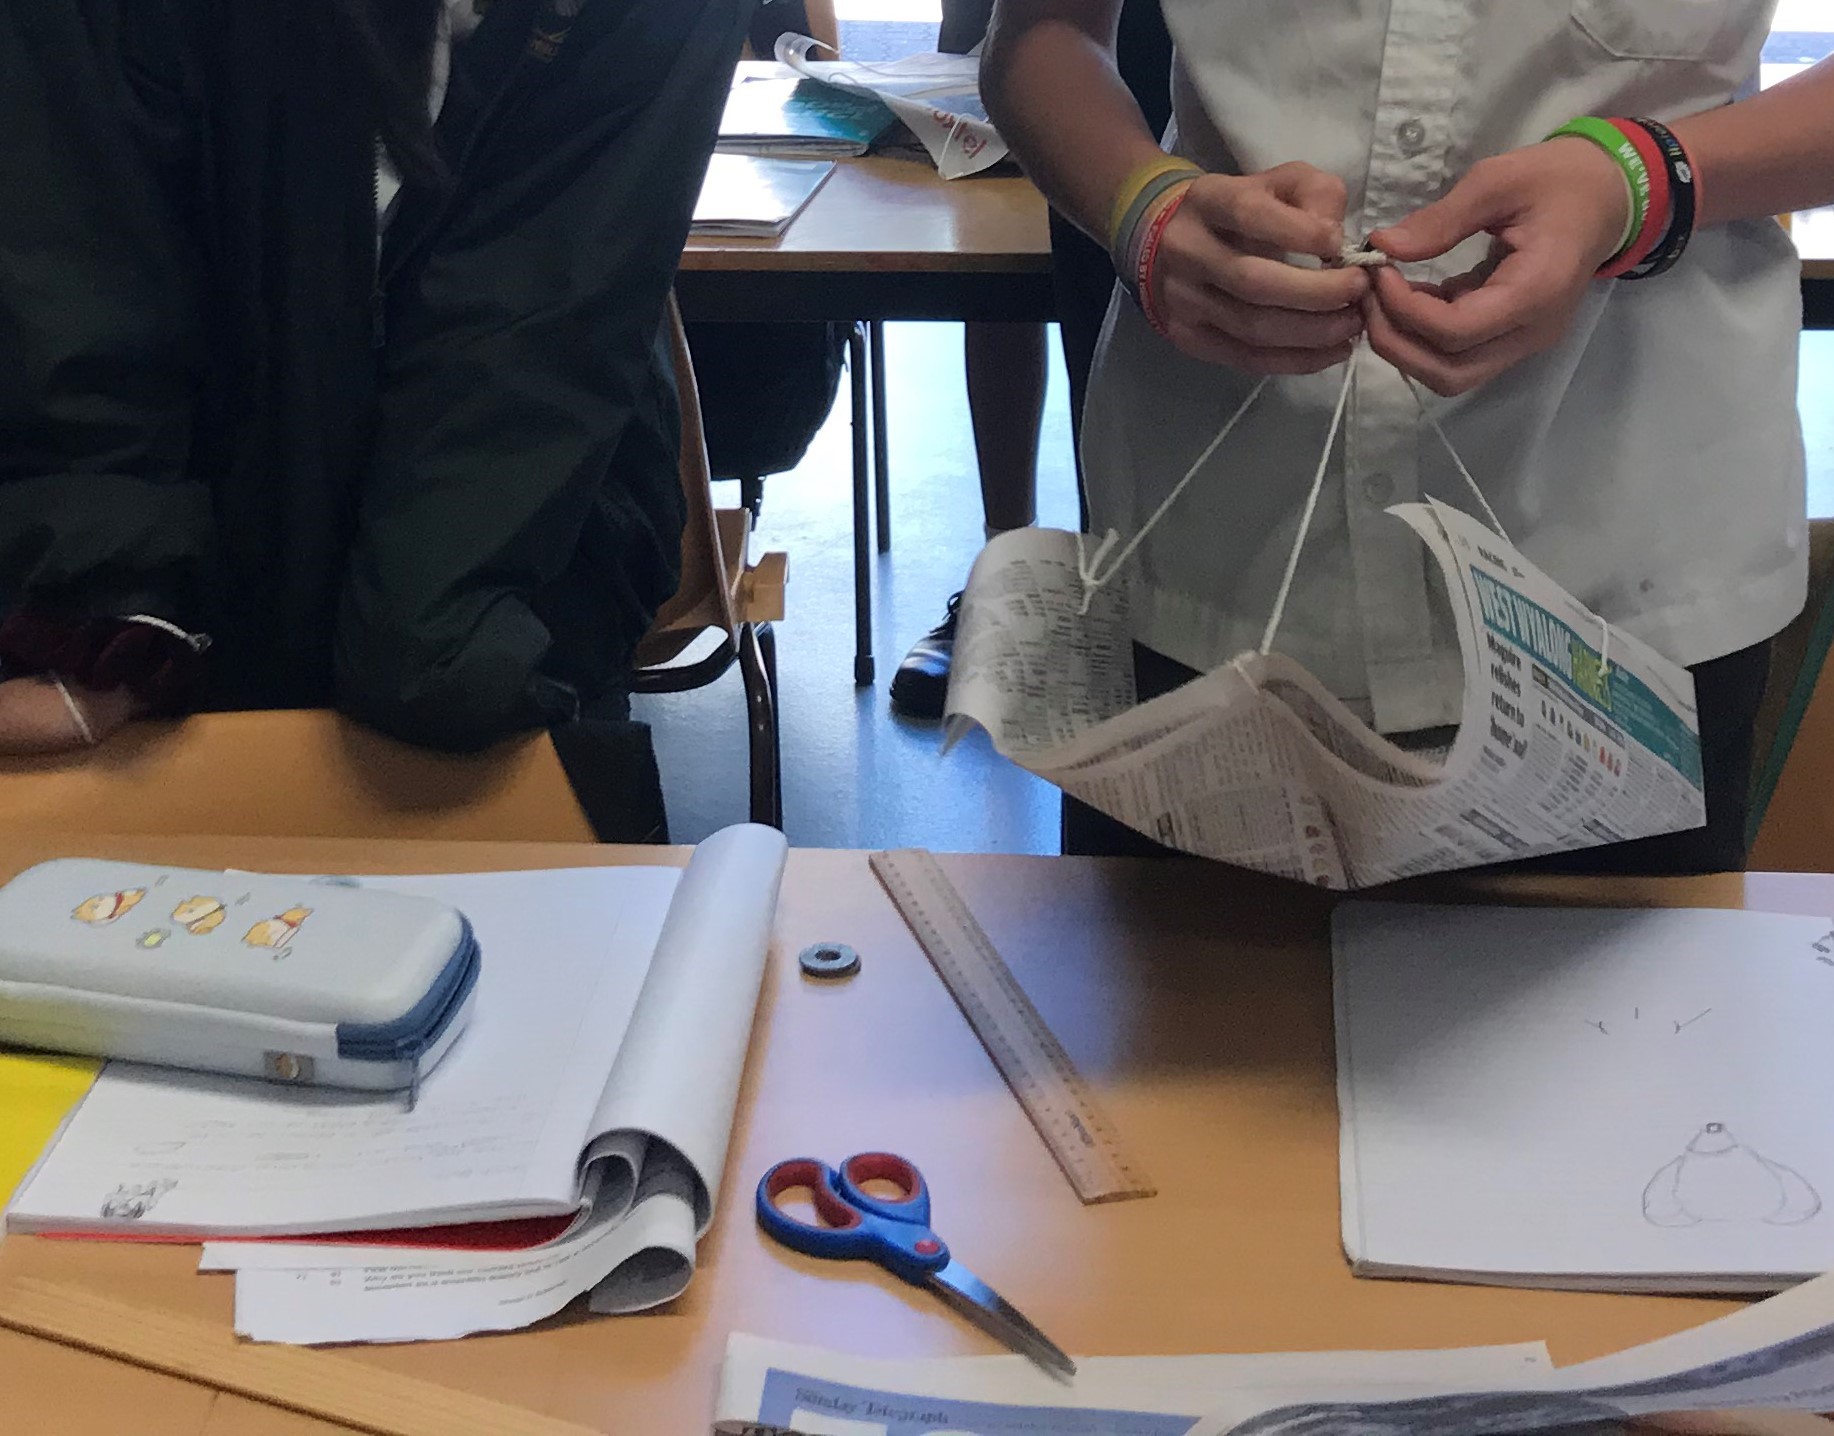
Mini challenge three – parachute challenge
Everything we did for the rotocopters and air rockets led to students being successful at this final challenge – to design a parachute for space exploration. Again, NASA has great resources for this. Check out their Eggstronaut Parachute Challenge.
We used the same processes, scaffolds and success criteria as the previous mini challenges. Students have done these processes twice and have received feedback twice. The parachute challenge is the time for them to become more independent learners. Instead of me pacing the students and releasing scaffolds as they are needed, students were given a project booklet and were allowed to pace themselves within a provided timeline.
When all three mini challenges were completed, each student had multiple samples of work from each challenge that showcase similar skills in designing fair investigations, communicating the results of investigations, and reflections on working in a team. Students can use these work samples to explain how they have grown over the term and how they implemented feedback to improve their work with each mini challenge.
So, what did the students think?
The class did an evaluation of the project. Here are some of their responses to what they liked most about the project.
I enjoy that we are given freedom in our projects to work creatively and not just writing in books.
I really love how our teacher is really understanding when it comes to our work because she does not pressure us like other teachers.
[I like] The rocket experiment, the parachute experiment and filling out the report.
What to do differently next time
Even though the project was designed so it accumulated to a portfolio in the end, many students ran out of time to document their learning progress. I also did not explicitly teach how to create a digital portfolio and articulate learning growth as well as I wanted to. Again the term got away from us.
Explanation texts is another aspect I would like to have taught more explicitly. Each mini challenge required students to explain the forces behind the rotocopter, air rocket and parachute and use forces to explain how their design changes worked. If I had my time again, I would have provided more scaffolding for students to express cause-and-effect relationships and how to move their writing from spoken-like to written-like.
During the October school holidays, I read Running the Room: The Teacher’s Guide to Behaviour by Tom Bennett. As indicated in the title, the book is on managing student behaviour in the classroom. I’ve been teaching for nearly 13 years and I don’t think I have nailed classroom management (but I don’t think any teacher can say they have perfected any part of their practice, in any stage of their career). Classroom management is complex and this book offers lots of evidence-informed and practical strategies for all teachers, regardless of their experience and career stage, in a non-preachy way. The key messages I got from the book are
Be organised and plan ahead so that it is easy for students to behave and hard for them to misbehave.
Create a class culture where it is the norm for students to behave in a way that lets them and others learn.
The book talks a lot about how people’s behaviours can be different when they are by themselves and in different group situations. A classroom and a school are large group situations and teachers need to create and sustain a culture where it is the norm to do the right thing.
The book re-affirmed a lot of things I’m already doing and gave me new ideas to trial as a teacher and a school leader. Here are 3 things I’ve learnt from the book.
1. Routines, routines and routines
I’ve always been a big fan of routines and Running the Room reaffirmed this practice for me. Explicit routines prevent behaviour problems from arising and helps create the class culture and norms. My classes have routines for starting a lesson, ending a lesson, entering different classrooms, how to transition between activities, etc. I have sometimes thought I was going overboard with the routines in terms of their detail and how we actually acted them out. E.g. We would practise how to line up, enter the classroom, etc. We go through these routines and practice them at the start of every term.
After reading the book, I am more confident that these routines support my students’ learning. I’m going to go further this term and trial practising the routines more regularly. So instead of going through them at the start of the term, going through them at least twice a term. The book emphasised that routines need to be taught, practised and re-taught BEFORE a problem occurs. Don’t wait for an issue to arise to re-teach a routine.
I’m also going to trial establishing more explicit routines for students to observe teacher science demonstrations, how to break off into small groups of science practical work, how each group collects and returns equipment, how each group asks for assistance and how homework is collected, distributed and returned.
Below are some of the routines for my Year 7 class, which I have further adjusted after reading the book, such as specifying the number of minutes that students must arrive to class after the bell (so there are no misunderstandings).
Of course, consequences are not all negative. Rewards and praise are needed to reinforce positive behaviours. Reading the book reminded me I need to be recognise my students more frequently for positive behaviours and avoid rewarding some students disproportionately. I have decided to trial using Class Dojo again to help keep track of positive behavious and support all students in gaining school merits.
2. Plan your consequences BEFORE you need to use them
Like all teachers, I’ve kept students in for detentions, called parents for misbehaviours and placed students on behaviour contracts. These things are bound to happen. Running the Room recommends planning and scripting how you will do these things BEFORE you have to do them. The purpose is to have a basic scaffold of what you are going to say and how you will respond in these situations. If you are an early career teacher, you can try role playing and practising what you are going to say to students/parents with a more experienced teacher.
In my earlier years of teaching, I had reflection sheets for students to complete when they are in detention to facilitate a conversation to support them to choose more appropriate behaviours in the future. I have no idea why I stopped using these sheets (perhaps because as I became more experienced, the number of detentions I’ve had to give has decreased), but I have now revamped them and them printed and ready to be used. I’ve also decided to let my students know how detentions will be operated so we have a clear understanding before they happen.
3. Have a removal strategy in place before you need it
Before I go any further with this, the book emphasises that removal should not be done on an ad hoc basis and it should be an unusual event in mainstream classrooms. However, sometimes there will be situations where a student needs to be temporarily removed from the class and a removal strategy should be in place before it is needed. This is something I want to work on as a Head Teacher. Do I have an agreed process with the teachers I supervise for the unlikely event that a student needs to be removed from class so that all students, including the student being removed, can continue learning? When such an event occurs, the class teacher should not have to think about who and where the student is to be sent to, what the student should be doing while removed from class, what happens after the removal, etc. It is important that students should know this process before they are removed (which hopefully will be never).
Overall, the book is one of the best books I have read on behaviour management. I love the emphasis on planning ahead and deliberately planning how you will run the room and set the class culture and norms. As emphaised in the book, these strategies are “rising tides – ones that lift all ships.”


