3 ways to stay organised with Google Classroom

This year I teach Year 7 maths, year 7 science and Year 12 chemistry in a large high school. Working in a large high school means that no one has their own classrooms. Homerooms are non-existent. My school has a fortnightly timetable cycle with each 50-minute lessons. I am in at least 10 different classrooms in a fortnight. This means every 50 minutes, I am setting up and packing up in a different classroom, utilising different audiovisual equipment and working with a different seating layout. Learning time can be easily wasted if I don’t have a system and a consistent routine for me and my students as we move from room to room. So here are three ways I use Google Classroom to make it easier for me and my students to stay organised and maximise learning time.

Every lesson and every detail are on Google Classroom
I post every lesson with every worksheet, slide deck, website, video and anything else I use for a lesson is on Google Classroom. This includes the lesson’s learning intention and success criteria for my Year 7 classes, and the syllabus content points for my Year 12 chemistry class. This means I can walk into any classroom, connect my laptop to the display screen and my entire lesson and everything I need is ready to go. I don’t need to waste time looking for files in File Explorer or my Google Drive. Everything is already in the lesson post on Google Classroom. This maximises learning time as it allows a more seamless lesson flow. It also minimises classroom management issues and cuts down on transition points.

At my school, every student has their own device, so I encourage my students to have the same resources opened on their device as I am going through them on the classroom display screen. This is very helpful for students who may have difficulty seeing the screen clearly for a variety of reasons. Students can also work at their own pace if we are making notes from slides that I’m using so the students who work faster can move on and the students who need more time can take more time.

Having every lesson posted on Google Classroom, lesson by lesson, also makes registrations so much easier.

A lesson post on Google Classroom for my Year 7 class
A lesson post on Google Classroom for my Year 12 class

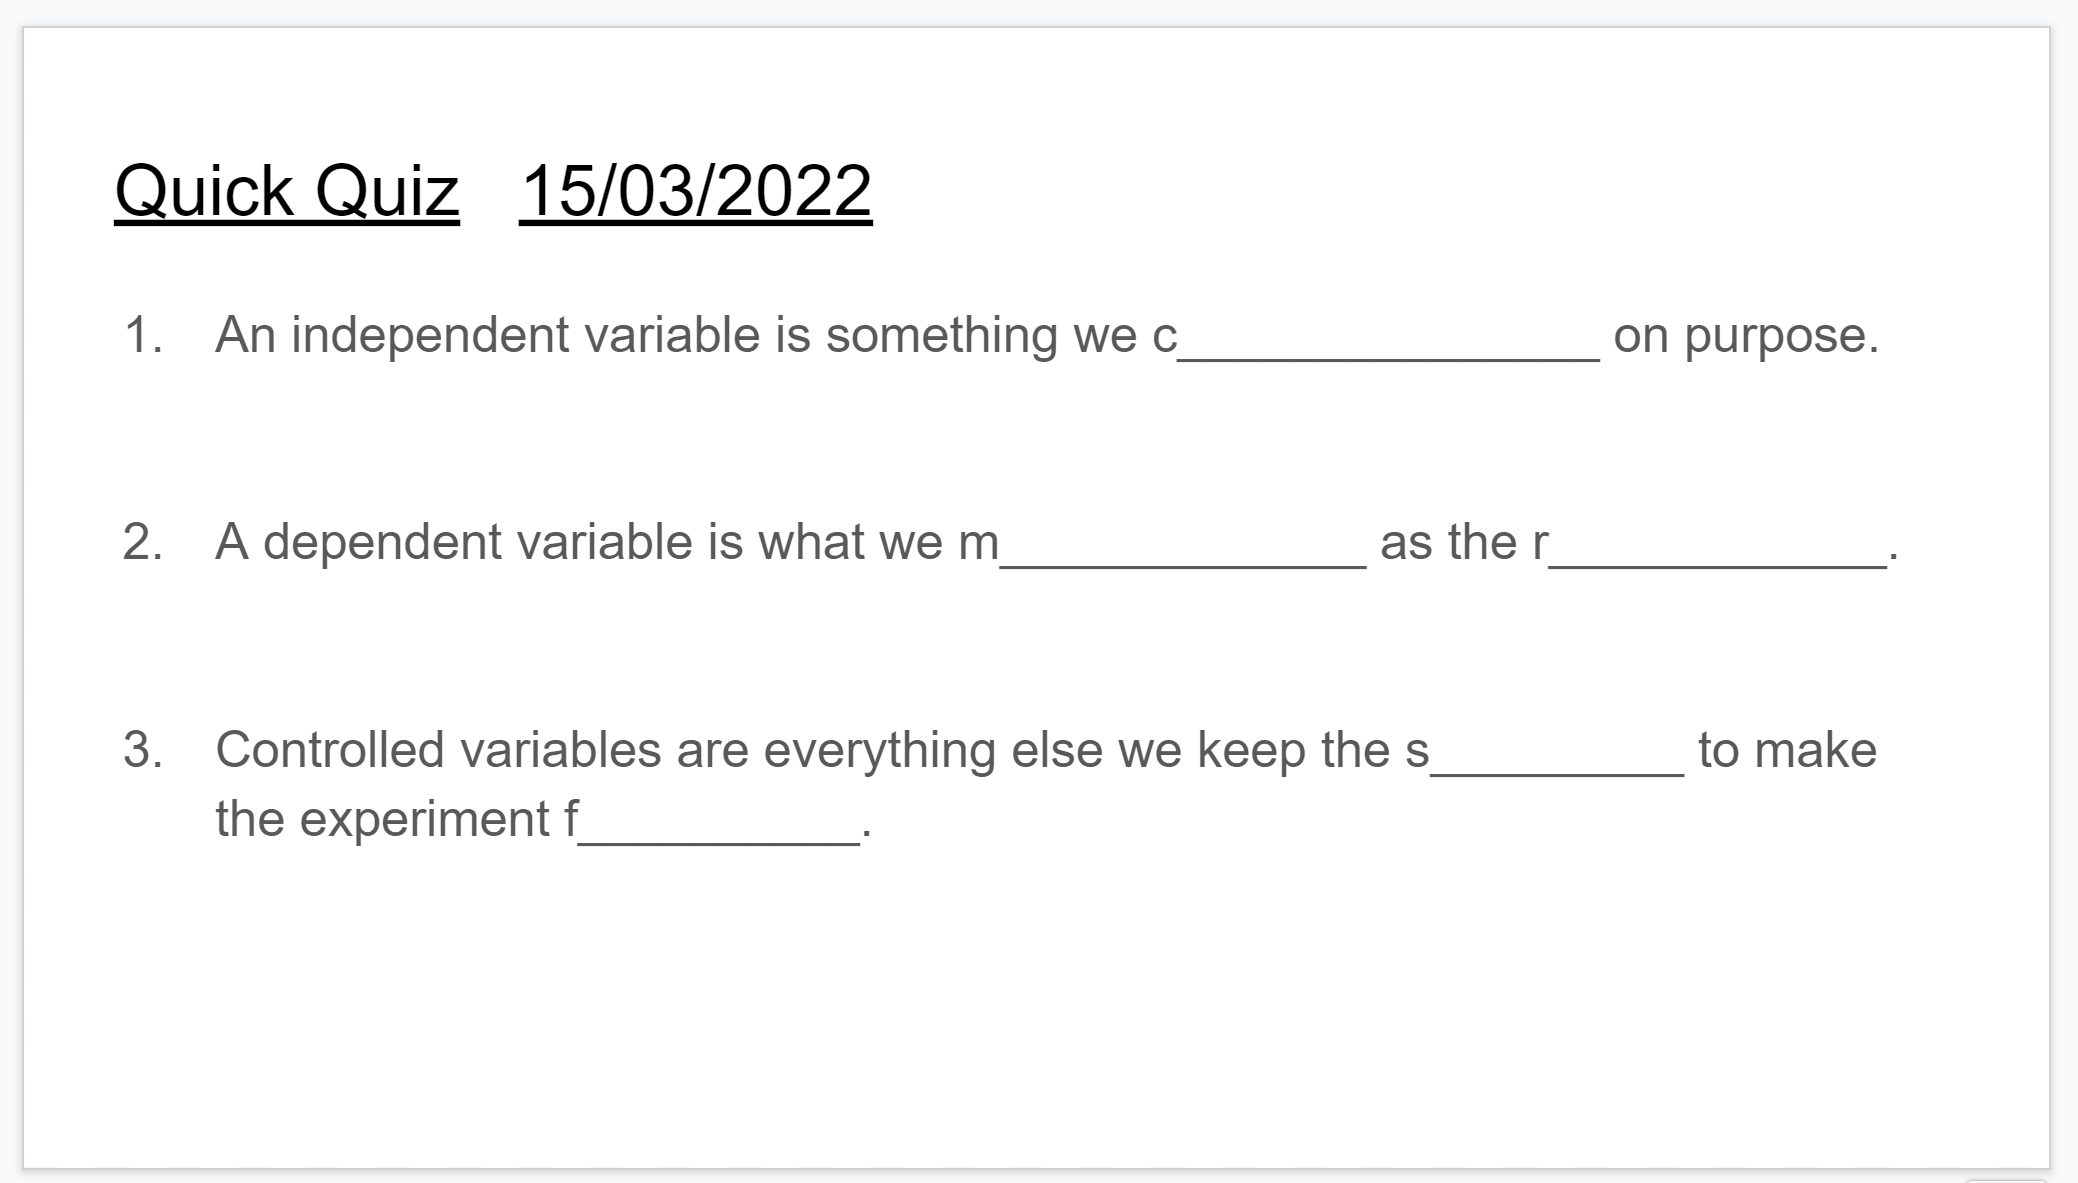
Lesson starter activity is on Google Classroom

I start every lesson with Quick Quiz, which is a bell ringer activity that the class completes in silence as soon as they enter the classroom. The Quick Quiz is a series of questions based on previous content the class has learnt. I use the Quick Quiz for retrieval practice and as a classroom management strategy. The students know as soon as they walk into the classroom, they do the Quick Quiz. This gives me time to mark the roll, check uniform and set up for the lesson. Each lesson’s Quick Quiz is on Google Slides which is placed on the top of their Google Classroom Classwork. I use to handwrite the Quick Quiz on the whiteboard, but found having the Quick Quiz prepared before the lesson results in a smoother start to the lesson.

An example Quick Quiz question for my Year 12 chemistry class

Lessons are posted on Google Classroom the day before

I post every lesson on Google Classroom in the afternoon the day before the lesson. This allows students to have a preview of the lesson before they walk into the lesson. I encourage my students to log onto Google Classroom in the evening or in the morning before school, so they know the type of learning to expect for the day ahead.  I find that when students know what to expect ahead of time, they are more settled and there are fewer classroom management issues. Some of my Year 12 students like to read the slides the night before if they have time so they can better understand the content when I explain it in class.

These three strategies are not unique to Google Classroom and can be adapted to other digital tools like Microsoft Teams. The key is using technology to facilitate routines that allow you to maximise learning time and feel less frantic when you set up a lesson.

Using Ozobots in the science classroom

I’ve been interested in using Ozobots in my science lessons ever since I saw this tweet of Ozobots being used to model different types of eclipses.

I really liked how the Ozobots were being used to create a moving model of eclipses, which is quite difficult to do without coded robots that automatically move (I have never found children holding basketballs and moving around another child holding a torch work well).

This term our school got hold of some Ozobots through the STEMShare initiative and I was able to test out how Ozobots can be used to enhance students’ understanding of the nitrogen cycle. Matter cycles through ecosystems, particularly the nitrogen cycle, can be quite difficult to conceptualise. Common activities include showing students diagrams of the nitrogen cycle, videos and getting students to physically model the cycle by pretending to be nitrogen particles themselves. However, just like eclipses, Ozobots provide an opportunity for students to create an annotated moving model to better visualise the processes.

So last Friday, my Year 9s used Ozobots to create a narrated video explanation of the nitrogen cycle with the Ozobot acting as a nitrogen particle. Here’s one of the videos.

The videos were created in an 80 minute lesson. What I really liked about using the  Ozobots was that it gave students the opportunity to work in teams and talk to each other about the nitrogen cycle. They worked in teams of 2 to 3 students draw the map, negotiate the narration and film the video. The activity gave them an opportunity to test and clarify their understanding of the nitrogen cycle with each other. The activity allowed students to determine if they really understand the nitrogen cycle. Prior to this, we had already done many other activities of the nitrogen cycle (worksheets, question and answer sessions, quizzes) and many students were confident they understood the nitrogen cycle. However, when it came to creating the narrated video with the Ozobots, many found that they didn’t know the nitrogen cycle as well as they thought they did.

Next time, I would also ask students to create a map so that the Ozobot wouldn’t be travelling in a nice unidirectional cycle but back-and-forth through different components of the ecosystem.

3 things I’ve learnt from supporting teachers


This year one of my roles is to support teachers in using technology to further enhance teaching and learning for their students. I feel very privileged to have such a position because it is one of the best professional learning experiences I have; I learn so much from the teachers I support.

So here’s a summary of what I have learnt:

1. It’s not about me; it’s about them and their students

Those who know me knows that I like to try new things, especially with technology. I like to take risks with designing learning new experiences. I often go into the classroom with “this can go really well or it will blow up in my face” (Don’t worry. The usual result is option A). This doesn’t mean that other teachers have the same attitude and that’s OK. Some teachers like small steps and others like giant leaps. I have learnt that the best way to support a teacher to shift their practice is to find out what they and their students’ needs are. It’s not about how I would teach the class.

2. I do. We do. You Do.

The “I do. We do. You Do” strategy is one that many teachers use to teach students reading comprehension and writing. It’s otherwise known as “Deconstruction. Group Construction. Independent Construction”. When teachers teach students how to write or read for understanding, they would first model the process, then students do the process as a group then students do the process independently. Basically the aim is to make the teacher redundant. This is what I’ve been doing with the teachers and classes I’ve been supporting. My aim is to make my role redundant. For example, in Year 8 French, students and their teacher have been using Google Apps to enable a more efficient feedback model. My role was to teach students how to use Google Apps, teach the teacher how to use comments, editing modes and revision history to give students feedback and show students how to act on this feedback in Google Apps. Towards the last few weeks of the term, I wasn’t needed in the room. The kids knew what to do. The teacher knew what to do. In fact, the student starting using Google Apps for feedback with her other classes, without me helping her at all. The kids are now using Google Apps in their other subjects without their teachers directing them to and are showing their teachers how to use the technology. So I have made my role redundant.

3. From little things big things grow

In the beginning, I was supporting the classes with “little things” like resetting students’ computer and internet access passwords, helping them connect their devices to the school wifi, showing students how to access Google Apps, things that I considered “little” as they were basic technical steps. However, I’ve realised these “little things” are absolutely essential for many teachers and students. It enabled the teachers and students to get over hurdles that switch off a lot of them from trying new ways of teaching and learning with technology.

So I have one more term in this role of supporting teachers. I have loved every minute of it so far. While teachers have thanked me for teaching them, it is them who are teaching me new things.

OfficeMix in a BYOD classroom

Last term I had the privilege of team teaching with a colleague who is teaching a Year 7 class this year for English, Maths, Science, Geography and History (at my school Year 7s are taught these subjects by the same teacher as a middle years strategy). This class, like many classes, consisted of students of varying ability levels and were learning English as an additional language. We wanted to utilise technology in a way that enabled more differentiation. personalised learning and more opportunities for teachers to help students one-to-one.

So we decided to use OfficeMix to flip the classroom. We didn’t flip the classroom in the traditional sense of getting students to watch video tutorials at home and then do activities in class. Instead, we did a brief introduction of the lesson (eg. brainstorm, linking the lesson’s content to previous learning, pre-loading metalanguage) then students watched an OfficeMix presentation on their own devices with a follow-up activities (eg. quiz or a worksheet). Students were told they can watch the OfficeMix presentation as many times as they need to in order to complete the follow-up activities successfully. This meant some students only watched the OfficeMix presentations once or twice while other students watched it many times. When students found the follow-up activities challenging, they were able to watch the OfficeMix presentation to work out how to do it. This allowed me and the teacher I was team teaching with to offer intensive one-to-one support to the students who needed it most.

Here’s an example of one of the OfficeMix presentations we used for this class:

https://mix.office.com/embed/ny5p5aabe06m

Using video tutorials is not new but what I like about OfficeMix is that it utlises PowerPoint. PowerPoint is a software that many teachers are familiar with so it is an easy step-up for for them to use the OfficeMix add-on. Many teachers already have many existing content presented in PowerPoint so they can easily turn them into video tutorials with minimum workload. What I personally found the most useful is that OfficeMix presentations works on all devices. The class I was teaching in had students bringing Surface Pro’s, Windows laptops, Macbooks, iPads, iPhones and Android phones. OfficeMix worked on all of them.

My next step is to have students making their own OfficeMix presentations to show their learning.

BYOD – the first steps

So my school has decided to journey down the BYOD path. This is for several reasons, including students already bringing in their own devices (not just their own smartphones but quite a few students bring in their own laptops and tablets) and asking for them to be connected to the school WiFi and wanting to continue technology-rich learning post DER (DER stands for Digital Education Revolution, an Australian government initiative that gave Year 9 students their own laptops. The funding for this has ended.)

Several teachers have asked for a blog post on our BYOD journey so far so here it is …

Before we jumped on the BYOD bandwagon, we wanted to know what students thought of this. This involved chatting to students to explain what BYOD is and whether they would bring the devices they already at home to school. We put the feelers out to see what students, parents and teachers think. The students we spoke to in these informal discussions were very supportive of the idea of BYOD and wanted to be involved in the school’s exploration of possibly implementing BYOD.

At the same time, we also looked at the literature review into BYOD and did some further research, which included using the insights from Mal Lee’s Bring Your Own Technology. Once we had a good grasp of the educational research and grounding for BYOD, looked into other school’s journey into BYOD, looked at what we already knew about our school community, we decided to propose a BYOD model where students bring in whichever laptops or tablets they wanted as long as the devices connected to the school WiFi and had certain basic software and apps installed. We also seeked feedback from people with a bit more expertise than we did at BYOD (hat tip to Pip Cleaves and Stephen Turner in particular).

So at this stage, the senior executive team was happy, the students we spoke to were happy and the teachers we seeked out for the BYOD trial was happy with the model. At this stage, our Community Liaison Officer and P&C gave their support to the model and was able to help us explain our BYOD proposal to parents. This launched us into mass data collection stage. We had a fair idea of what devices our students already owned and the challenges that will face our students’ families if BYOD is implemented, but wanted to be 100% sure and to hear as many voices and ideas as possible.

We surveyed Year 7 and 8 students and their parents. From the student survey data, we chose a group of students that held a diverse range of views towards BYOD for student focus groups, which is also acting as a student advisory group for BYOD. The focus groups enabled students to explain their concerns towards BYOD in detail and as a group come up with solutions to address their concerns.

From all the data collection and consultation with the school community, there was overwhelming support for BYOD and the reasons cited include:

-students already being familiar with their own devices
-having access to their own devices in class caves time as they longer need to move from their regular classrooms to a computer room
-bringing their own devices to school will make learning more fluid between school and home
-technology being a part of students everyday lives

The main concerns that were raised were:
-how equity issues will be addressed
-safety and storage of devices
-digital citizenship

The main lessons we’ve learnt from our BYOD journey so far is to involve the school community as much as possible. This sounds obvious but from our experience it is the students and parents who have come up with the best solutions to address challenges of BYOD.

Our next step is to work with teachers and students on the next challenges, which includes leading a classroom with multi-platform devices and learning design that will best utilise students’ devices.