Teach writing by imploding a watermelon đźŤ‰

I have been imploding watermelons with rubber bands with my Year 7 science classes for over two years. The kids absolutely love the experiment. We work as a class to patiently place rubber bands onto a large watermelon one at a time and revel in being suddenly splashed by pieces of watermelon. Here is a video of our experiment. See The Big Watermelon Experiment for details on how to do the experiment.

Imploding a watermelon with rubber bands is also a great way to teach how to write explanations in science. I like to use a cause-and-effect graphic organiser to teach students how to use forces to explain what happens in the watermelon implosion experiment. It’s a great opportunity to teach how to use scientific concepts to explain observations. After the graphic organiser, I like to use an explanation scaffold to support students to write an extended text that sequentially explains how rubber bands can implode a watermelon. In this activity, they use casual connectives, time connectives and rhetorical questions. It’s also a great way to embed any paragraph structures your school prefers like TEEL or PEEL.

Use the link below to download and adapt the writing scaffolds for your students.

If you have done the watermelon implosion and/or used the experiment as an opportunity to develop your students’ writing skills, please comment below to share your experience.

Cardboard games STEM challenge – what worked well and what I’d do differently next time

This year I have a Year 8 STEM elective class. It is a new course that my school is running where we build on existing syllabus outcomes in Stage 4 science, mathematics and technology mandatory. Students learn (and master) the core content in their traditional timetabled science, mathematics and technology mandatory classes and then apply it in their STEM elective. The STEM elective takes a project based learning approach with an emphasis on the design process.

In Term 1, we did the cardboard games challenge. The image below shows the project outline.

Image of project outline  - How can we create a cardboard games room for Concord High School?

We used Caine’s Arcade as our hook activity.

I chose the cardboard games project because I wanted to emphasise to my students that STEM isn’t about fancy gadgets or coding. STEM is about solving problems within parameters, with ongoing prototyping. Making games out of cardboard is also a very low-cost project, which means students can create lots of prototypes and go through many feedback cycles. This was really important in our first STEM project.

The photos below show the cardboard games the students made.

cardboard skeeball
cardboard darts
high score board made of cardboard and masking tape
cardboard pinball
cardboard skeeball
cardboard dunk shooter

So what worked well?

  • The project unpacking template that was inspired by Bianca Hewes. I found this template worked well in enabling students to engage with the project outline, identify their strengths and ask any clarifying questions. Students shared their completed templates with their team members so they can work out their group strengths and negotiate tasks based on their strengths.
  • The overall project allowed lots of differentiation and student voice. Students chose which cardboard game to create. Some students chose mechanically complex games like pinball while other students chose simpler games like skeeball. I had to guide some groups in adjusting their games throughout the project when they were not able to carry through their initial ideas. Eg. the group who wanted to make a cardboard claw machine had to adjust their game quite a few times after each prototype.
  • The ongoing prototyping and feedback as part of the design process. The project allowed students to provide feedback to each other and help each to solve problems.
  • The project presentation – We ended up presenting the project to a Year 7 group of students. While the original plan was to run the games room for the whole school, some of the cardboard games were not going to be able withstand over 1000 students playing them so we decided on one Year 7 class as this was our first project.

What would I change next time?

  • Strengthen the use of a consistent feedback protocol. For this cardboard project, I used the What Worked Well/Even Better If feedback protocol. Students gave their feedback verbally. Next time, I would have students write down their feedback so that each group can further reflect on it.
  • Strengthen the digital portfolio. I originally planned for each student to individually create a digital portfolio to record ongoing evaluations of their prototypes and how their were working as a team. This did not happen in this round of the project. We still did feedback, reflections and evaluations but it was more disjointed (done via verbal feedback and Google Doc templates) than I would’ve liked. Next time I want to test the use of a digital portfolio. I’m thinking of using SeeSaw.
  • The project presentation – Next time, I’d like to bring in an arcade games expert or someone who runs carnival games. Next time, I’d also have each student group provide a short presentation on their game and the design process they used to make each prototype before having students play the games.

Overall I am really, really proud of the effort, prototypes and end products from the Year 8s. The project gave me an opportunity to test some processes in a new elective that I can tweak for their upcoming projects, which will include pixel art, interactive posters and propeller cars.

Running to read, write, listen and speak

Literacy in science has always been a huge focus for me. Not only is literacy a priority area for our school, but I like to be educating my students so they are young scientists and there’s nothing more important to a scientist than to be able to understand and communicate their ideas clearly.

I personally find reading and writing to be the easiest to integrate into high school science. However, listening and speaking are a little harder for me to embed. Just a few days ago I remembered a strategy called running dictation which I learnt from an English as a Second Language consultant a few years ago.

Running dictation is a game that students play in groups to practise their reading, writing, listening and speaking skills. The teacher puts a short passage somewhere in the classroom (in my case it was a passage on the atmosphere). Each group of students selects a reader and the rest are writers. The readers in each group need to run (or in my classroom, walk very fast as I don’t want any injures) to the passage, read it silently to themselves, remember as much as possible, run back to their team, recite what they remember to their team and the rest of the team writes it down. The first team that gets everything correct (the words, spelling, punctuation, etc) wins. You might think it’s a noisy game but because each team doesn’t want the others to hear and steal their work, they work very quietly. I did this with Year 8s the other day and they absolutely loved it. I like how it allows students the opportunities to work together as a team and speak about science.

Year 8 students in a running dictation activity

Year 8 students in a running dictation activity

I know running dictation isn’t new but I haven’t seen it used in science classes so I’d thought this blog might give other science teachers some ideas for literacy. I find that running dictation allows students to read, write listen and speak science in a fun way. It’s gets them up and moving and doesn’t make literacy seem like a drag like it sometimes is.

In future lessons I’m going to try some of these other ideas for running dictation to make it more challenging for my students.

Formative assessment with hexagons

Formative assessment is something I’ve been putting a lot more emphasis on over the past few years. I’m so sick of just relying of end-of-topic exams to gauge what students have learnt. I want my students to continuously question how they are going and make changes to their learning accordingly. This is one of the reasons that my faculty has embarked on a Structured Observed Learning Outcomes (SOLO) journey this year. One of the ways that many teachers using SOLO use to assess student learning is with SOLO hexagons.

SOLO hexagons involves the major concepts or ideas from a topic to be placed individually onto hexagons. Students then work individually or in groups to connect the hexagon concepts together and they must justify why they have made these connections. It is the justification where both the teacher and the student can assess the student’s learning. It is how students have connected the hexagons and their justification of WHY they have done it that way that allows their learning and thinking to then be assessed using the SOLO taxonomy (or not; the hexagon activity still works with no understanding of SOLO).

Here’s a video showing one way of using the SOLO hexagons in a UK science class.

Here’s an explanation of how to use SOLO hexagons from the SOLO guru, Pam Hooke.

I changed the hexagon activity slightly to suit the needs of my students. The picture shows the instructions that my students received.

instructions for hexagon activity

And here are the hexagons my students used (note that the hexagons were pre-cut for students and placed into zip lock bags with the above instruction card). My students worked in groups of 2 to 4. I used the SOLO hexagon generator to create the hexagons.

Here’s some samples of the hexagons my students made.

20140406-140303.jpg

20140406-140251.jpg

20140406-140235.jpg

Some things I noticed was that:

  • My students were all fantastic at explaining each hexagon concept
  • Some groups connected all the nervous system concepts and the endocrine system concepts together, showing they had an understanding that the nervous system and endocrine system worked together. However all the groups had the immune system concepts separate altogether. I did spend a lot of class time making it explicit that the nervous system and the endocrine system work together to control and coordinate the body. And while the students’ project was to make a fact sheet about how a particular disease/health issue affected the nervous system and the endocrine system, they seem to think that the immune system works on its own and is completely separate from the other systems.

From this activity we discussed their SOLO levels of understanding and how they can use their hexagon connections to see whether they were at a unistructural level, multistructural level, relational level or extended abstract level. Most students concluded they were at a relational level for most concepts and some thought they were extended abstract for some parts of the topic.

The SOLO hexagon activity is definitely something I will use again with my students. Now that they have done it once, the next time will run even better. Feedback from students was that they enjoyed talking about science with each other and that they learnt a lot from each other just by listening to what others had to say about each concept.


Learning about SOLO – using self regulation and feedback to increase student achievement

This year my faculty have been designing units of work for the new NSW science syllabus for the Australian Curriculum with the Structured Observed Learning Outcome (SOLO) framework.(If you don’t know what SOLO is, watch this video for a crash course) The reason why we are investing quite heavily into SOLO is because as teachers, we know that self-regulation and quality feedback are the two of the most effective elements in increasing student achievement. SOLO, with its associated learning intentions and success criteria, will allow our faculty to develop our students’ self regulation skills and further improve the quality of teacher feedback and peer feedback.

For most of the year, we have been designing learning with the SOLO framework so that each series of lessons have learning intentions and success criteria catergorised  by the different SOLO levels of thinking and understanding. A couple of weeks ago, we went a step further. The whole faculty sat down and designed an agreed approach to how we will use these learning intentions and success criteria. As a team, we decided learning intentions, success criteria and SOLO were examples of best practice, but we need to ensure that it filters down to every individual student. We agreed that learning intentions, success criteria and SOLO must be high visible and evident in everyday teacher practice for it to have maximum impact on student achievement.

As a team we decided on the following for communicating learning intentions and success criteria to students:

  • At the start of a topic, students are given a list of the learning intentions and success criteria for the whole topic so they know where they are headed before they start learning about the topic.
  • Each lesson will have the specific learning intentions and success criteria displayed. This can be written on the board, or displayed via a data projector or interactive whiteboard.
  • The teacher will explain the learning intentions and success criteria to students at the start of the lesson.
  • At the last 10 minutes of the lesson, students are to reflect on whether they have achieved the success criteria for the lesson and what they need to do next to be successful.

As a team we also agreed that we need to teach students about SOLO. We have designed different activities for students to learn about SOLO. Here’s one of the activities

As a team we also agreed to providing student feedback using the SOLO framework.

What we hope to see are:

  • Students and teachers using a common language to discuss levels of thinking and understanding
  • Students and teachers using SOLO as a way to see current levels of thinking and learning and where that thinking and learning needs to head
  • More students moving from a fixed mindset to a growth mindset. Many students have a mindset that they are “not good” at science. We want our students to realise that to be good at science, there needs to be a certain level of thinking and learning that can be achieved with effort, as opposed to natural abilities. It’s part of making learning and thinking visible.

Our faculty has also devised a draft plan to evaluate the impact of SOLO on students’ achievements and mindsets, with help from a university academic. So watch this space for more updates on our SOLO journey.


3 reasons why students are switching off science

There is a decline in student interest in science. Just type “students decline science” and hundreds of articles will come up of students not choosing to study science in post-compulsory schooling in countries like Australia, USA and the UK. At a time where technology is rapidly increasing and the world is facing issues like climate change, rapid rates of extinction, water shortage and food shortage, it is worrying to see students switching off science.

What I find more concerning is my observations that kids love watching science YouTube channels at home in their own time, but they are not enjoying school science. Something is wrong. While the reasons below for why students are switching off science are not validated by any research data, they are inklings that I have based on observations of students and numerous student surveys completed at my school on their engagement in science.

Reason #1 – Science teachers rely too much on whiz-bang experiments to make science interesting

I think every science teacher is guilty of this. I certainly am. We often use showy experiments for entertainment to keep students engaged. Instead of promoting our subject as intrinsically interesting, we use colourful and bubbly experiments to “trick” students into liking science. How many times do we have students walk into a science lab and ask “are we doing an experiment today” and groan when the answer is no. Of course experiments have a place in science, but science isn’t about setting things on fire or making things explode. Science is a way of thinking and aligns with humans’ natural curiosity of understanding of the world around us. I think we have pushed science as a subject of fire and explosions for so long that this is what students expect and they are disappointed when a unit of work or a series of lessons do not have experiments.

Reason #2 – Science lessons often do not allow all students to experience some success

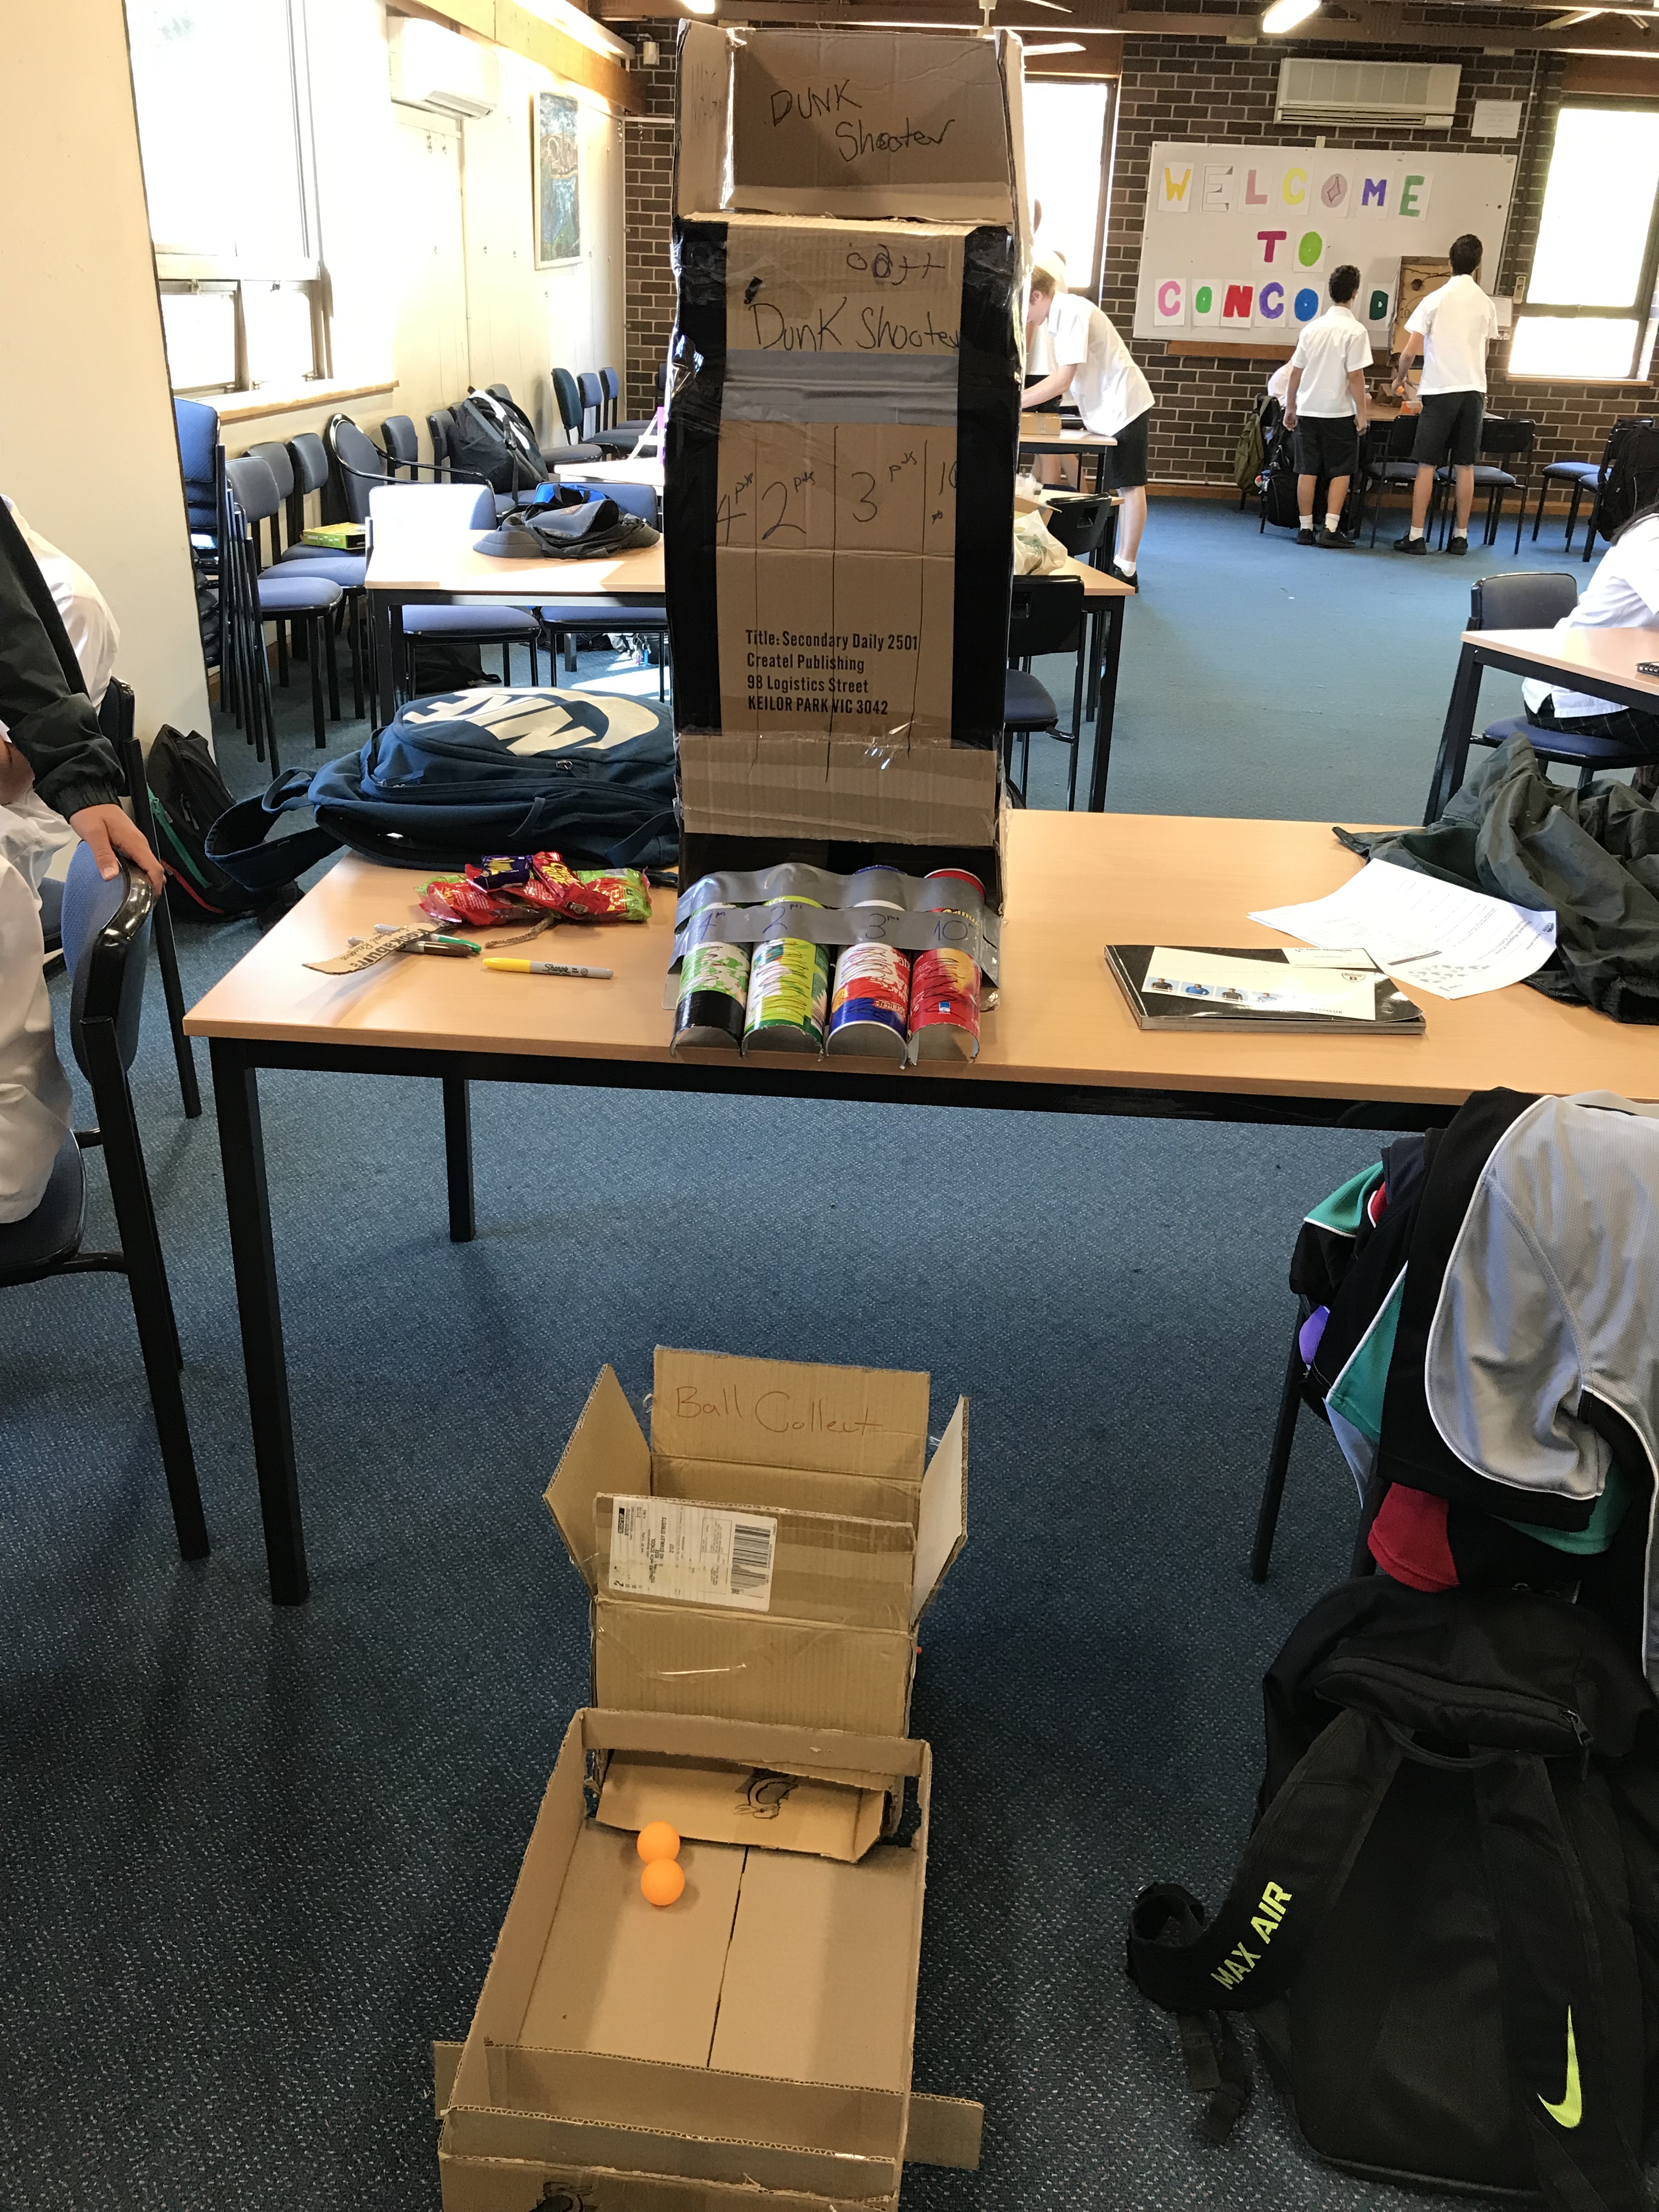
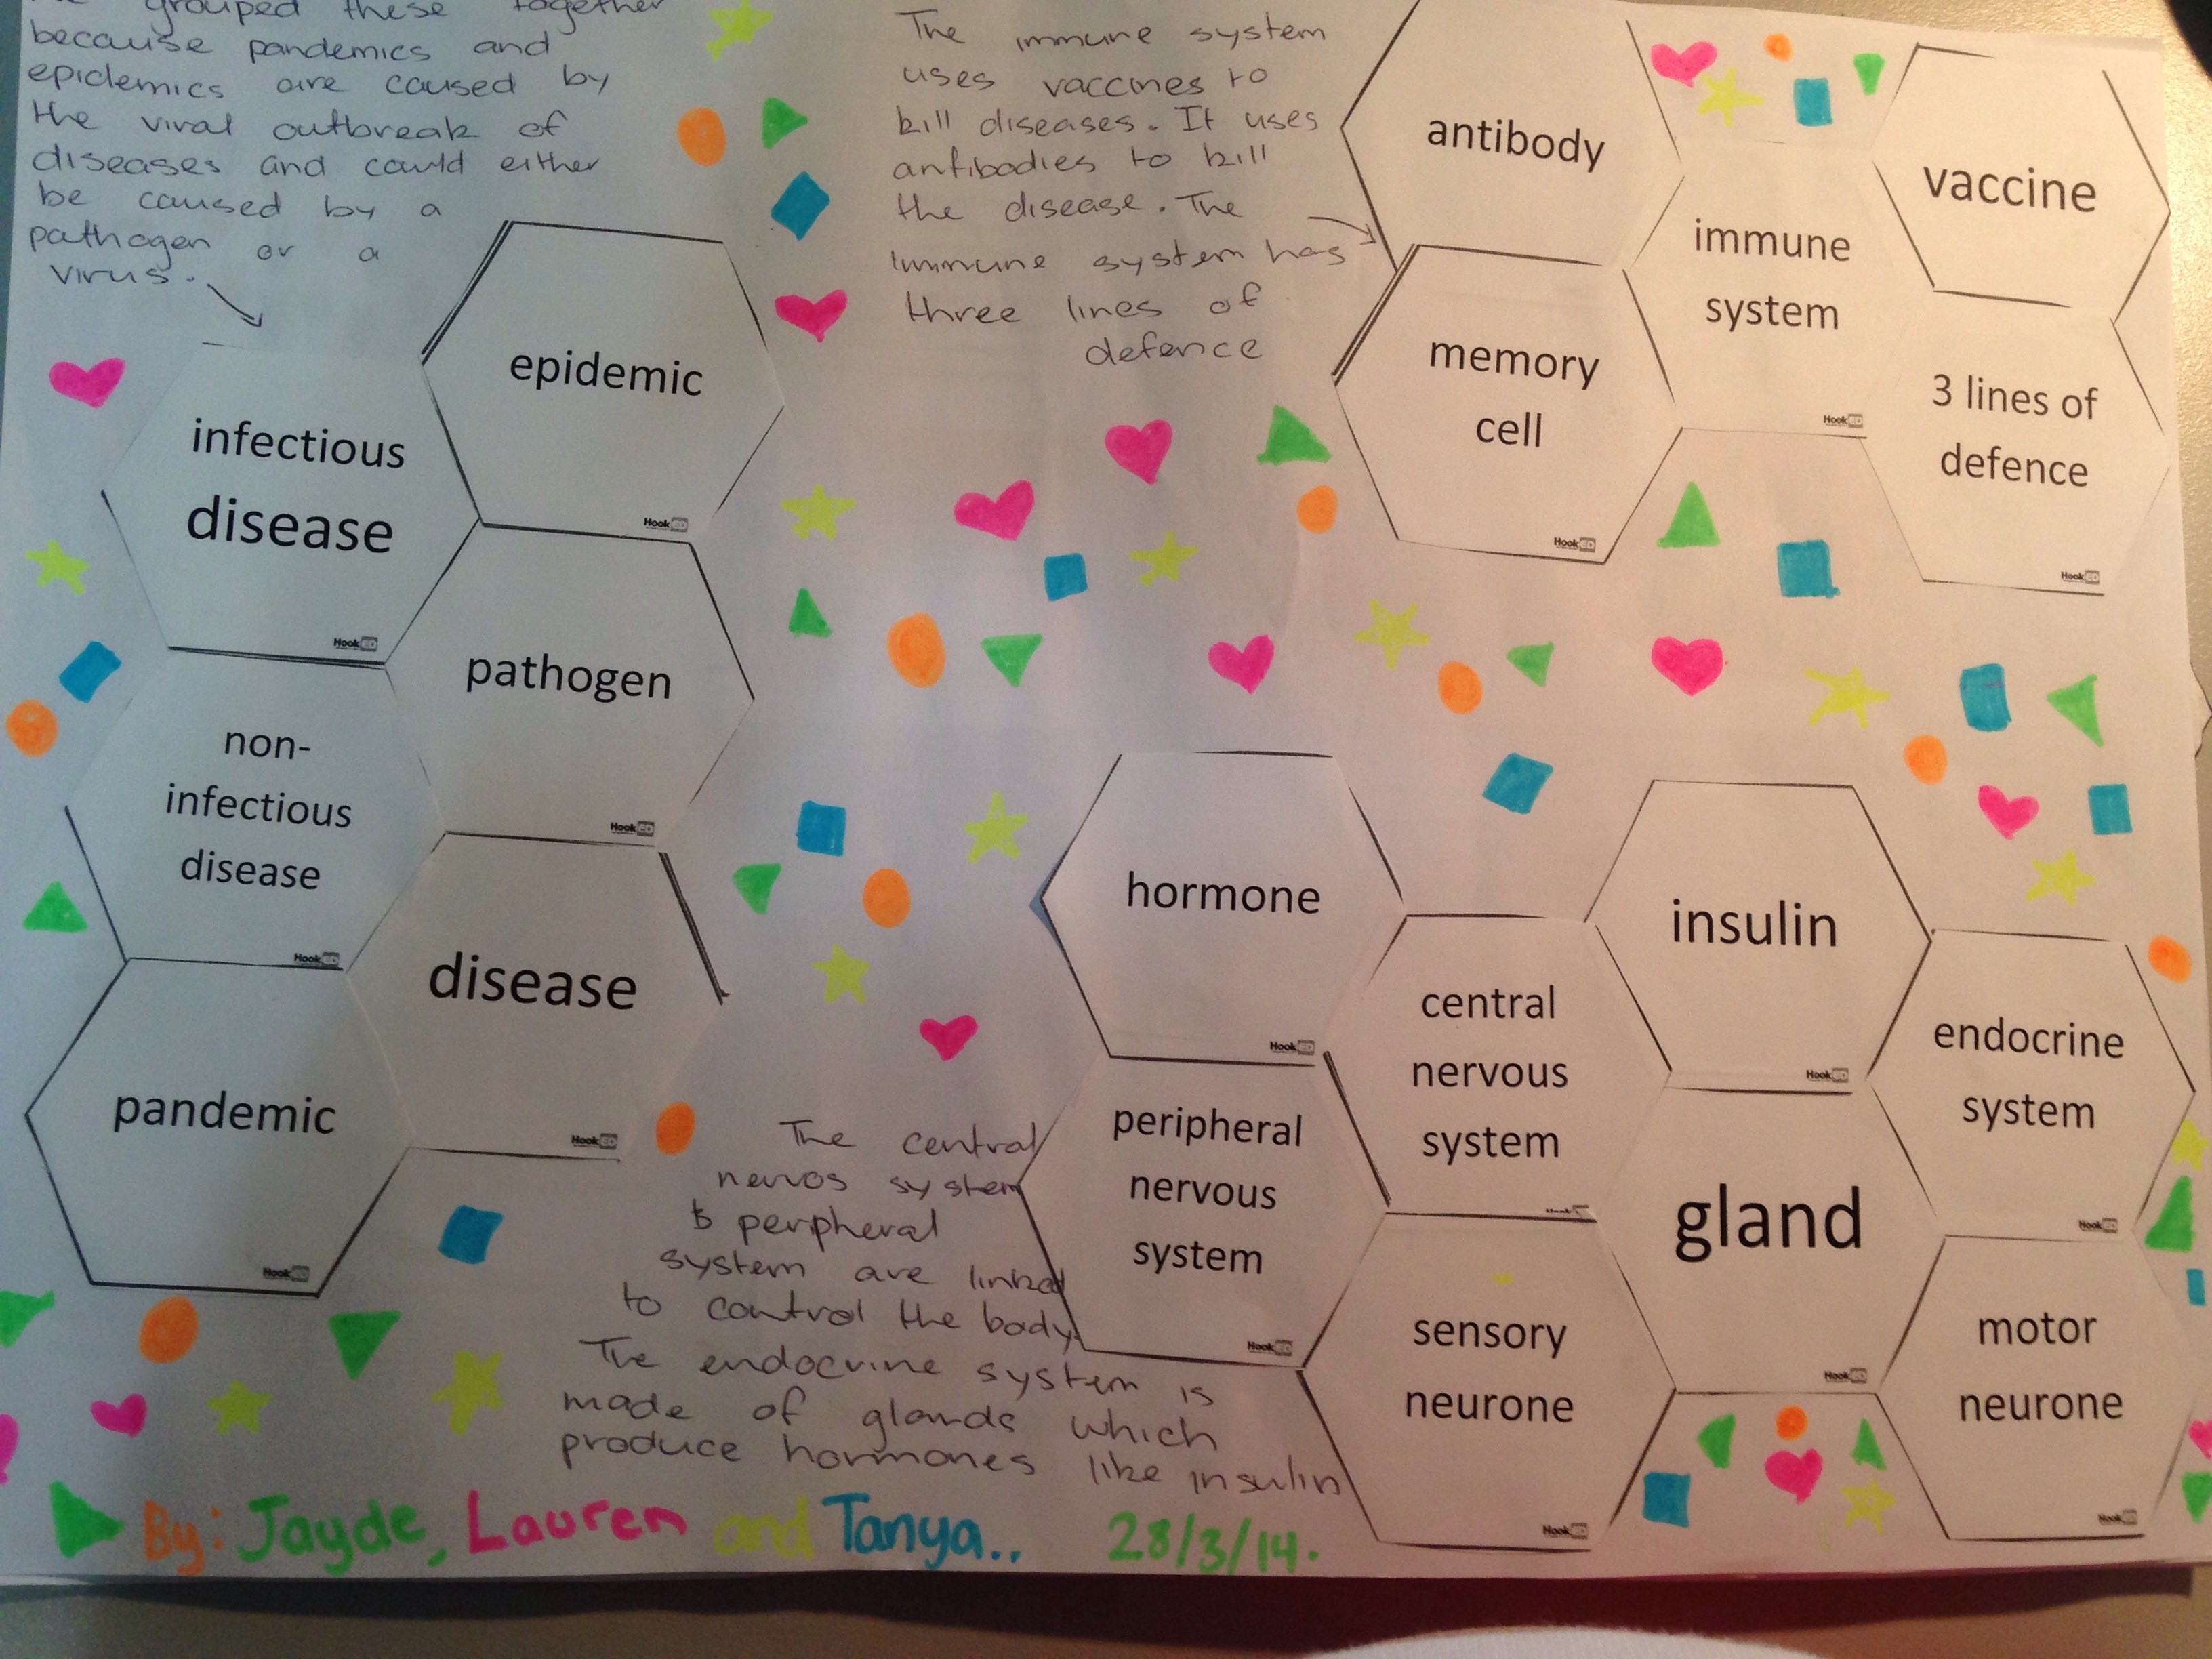
In NSW, Australia, Year 8 students do a state-wide test called Essential Secondary Science Assessment (ESSA). At the end of ESSA, students are asked to rank their favourite subjects. Since 2006, year after year the results show students like PDHPE and Visual Art the most. My gut feeling is that these subjects allow ALL students to experience some success. In Visual Art, it doesn’t matter if you are a not-so-good painter or if you are as brilliant as Picasso, every single student is able to produce an artwork, which is showcased. Same with PDHPE, it doesn’t matter how bad or good you are at sport, every single student have been part of a team that has won a game and experienced the excitement of success. Not so in science. In many science lessons, students don’t produce anything that can be showcased. Only a handful of student who are “good” at science feel success. A lot of students think they are “bad” at science. This is one of the reasons why I’m a fan of project based learning (PBL). PBL enables students to create a product that shows their learning and they showcase that product to an authentic audience. This give students a sense of success.

Reason #3 – Students don’t know the careers that science can lead to

Not many students see scientists in their everyday lives. They see bankers, accountants, lawyers but they rarely see scientists or associate jobs with science. In the surveys at my school, the most common reason given for not wanting to study science in post-compulsory schooling is that they don’t need science for their job or career. While we as science teachers know that many jobs and careers require some understanding of science, do our students know? Do we link our students to current practicing scientists so they can what they learn in school is actually used in people’s jobs in real life?

At my school we have been pushing for connections with university pHd students and current scientists. Through the University of Technology, Sydney (UTS), our students have been lucky enough to go to the university regularly and hear about current research conducted pHd students and meet scientists face-to-face and know that science can lead to a fulfilling career. We have utlised the scientists in schools program to have a scientist come to talk to our students about what she does in her everyday job and why finds her job fun and rewarding. We also ask parents to come to school and speak to our students. This year, we had a parent who works in the communications industry speak to our students about his job, how it requires an understanding of energy transmission and waves and how much he loves his job.

A marine biologist specialising in sharks speak to Year 8s about this job and why he loves being a scientist.

A marine biologist specialising in sharks speak to Year 8s about this job and why he loves being a scientist.

And has all this gotten results? Many of our year 10 students apply to attend UTS summer school where they can choose from film, design, science, IT and health over the Christmas holidays. In previous years I have struggled to get any students to apply for the science summer school. Everyone wanted to film and design. After a couple of years of connecting students with university science students and real scientists, we have 12 students apply for science summer school this year.

As we are entering the new syllabus for the Australian Curriculum in NSW, it is time that science teachers re-think HOW we teach science and how can we work with the scientific community to increase student engagement in science.